My husband says....."You're giving away all your secrets"....and I say back to him..."no...I am sharing what works for me".....Welcome to Ros, Hazel, Kat and Artylady....I hope you find my blog interesting...stick around..and don't forget to leave some comments or questions....I'll reply as soon as I can.......
Back to blogging:
I've heard of cultured butter before...but never had the opportunity to taste it....So...me being me, I thought I would just make some and try it...Why not!
To make cultured butter, you first need to pour your cream in a ceramic bowl...and cover with a cloth.
Leave the cream on the kitchen bench for 24 hours...not too much longer though as it will be too sour and give an undesirable flavour in your final butter.....
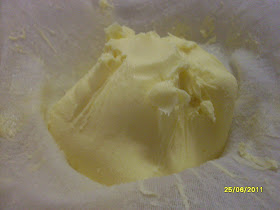
So after 24 hours, chill the cream again in the fridge for a few hours....then beat with a whizzer or shake vigorously in a sealed glass jar, until the solids separate from the milk...leaving your cultured butter and buttermilk....Strain and wash your butter...add salt to taste.....and store your Buttermilk in the fridge for later baking.
Drain well to preserve the Buttermilk for baking.
 |
| L: Cultured Butter, Right: Butter |
***************************************************************
Extending your Buttermilk:
After making Butter at home...you will be left with a lovely natural Buttermilk...which is perfect for baking...I recently made Buttermilk Scones...and have been drooling thinking about them ever since. There are plenty of recipes on the net for using Buttermilk....I am also interested in using it to coat chicken drumsticks before baking...this sounds interesting.
The standard rule to extend your natural Buttermilk...is 1 to 3.....
Measure your Buttermilk...and let's say you have 1 whole cup....add three times that amount in Milk.....to the Buttermilk....so you would add 3 cups of milk to your Buttermilk....
Let stand for 24 hours at room temperature, covered with a cloth....If you started with one cup of Buttermilk....after 24 hours you would have 4 cups of Buttermilk....
a much better amount to be experimenting with for baking.
This Buttermilk will also store in the fridge for 2 weeks...Actually it won't ...because I will have used it up before then.
I also had a go at Rhonda's Orange Cake over at Down to Earth.....truly one of the easiest cakes I have ever made....In the back of the photo, you can see what is left of one cake....I made a double batch of batter.....one cake for now..and one for the freezer.....We went through one whole cake just tasting it.....
I guess I don't have one for the freezer now......
All you do is:
Throw a whole Navel Orange in the whizzer and blitz it....then add the eggs, butter, sugar and flour....pour into a lined baking loaf tin...and bake for about 40 minutes in a medium oven.
For the original recipe go over to Down to Earth....Thank-you Rhonda for an amazing recipe...I'll make a lemon one next time, but Buttermilk scones is on tomorrow's baking list.


Hi Narelle! I make cultured butter only now. I'm pleased you made up the whole orange cake. Tasty, isn't it!
ReplyDeleteHi Rhonda... the taste is so much better....and that cake of yours...it will be the first thing DS16 asks for when he comes home from school this afternoon.
ReplyDeleteGreat idea about extending buttermilk - thanks for the tip! I love to make butter from fresh jersey milk and the cream is YUMMO :) The butter sure tastes great, doesn't it. You girls have me thinking about making that orange cake... we have strawberry shortcake to use up tonight but maybe tomorrow :)
ReplyDeleteLittle Home In The Country: Hi Sherri, your'e so right...the taste is so superior...now I am thinking about fresh milk again...your strawberry shortcake looked very yummy too. I love how we all share recipes, it's lovely.
ReplyDelete