WELCOME to my BLOG

Hi there!

I’m slowly working towards some simplicity within the home, but hey! It’s a lot of hard work!

I love having a go at growing my own veges and always use herbs fresh from my garden. I try to plant from seed whenever I can and have learnt to save and share my own seed for the following year. I make Award Winning preserves and pickles; and my husband brews Award Winning boutique beers as well. I love to stockpile and try to limit quick trips to the shops. I dabble in bread making and enjoy making my own stocks too.

I enjoy feeding my family good hearty meals, nothing like those tiny restaurant stacks you have to look for on the plate. My husband maintains our vehicles and machinery and we both enjoy fabricating on a small scale mostly relying on metal & timber recyclers for any materials needed.


While I don’t always have time to reply to comments, I love reading them. I hope you enjoy your stay and I hope you learn something new because I love sharing what I learn, and I'm always looking for another new skill myself.

Cheers!

Showing posts with label cheese. Show all posts

Tuesday, March 29, 2011

Camembert, Rendering, Preserving Lemons & Dishcloths

Hi Geoff, Hi Debbie, welcome to both of you....
Feel free to look around, and I would love some feedback......

***********************************
Wrapping the Camembert.
***********************************


I checked out the Camembert, and yep, It was ready to wrap...I first wrapped it in a grease proof like paper, and then wrapped it in foil....Back into the cheese-cave with both, for just a few weeks...as hubby prefers it really young...He says "If you leave it too long,  it just tastes like dirt."  Well, I kind of agree with him, after tasting the last one while it was young....it was really really nice....I guess that's another plus for making your own cheese, you can stop the maturation, when the cheese is the taste you want. 


***********************************
Finishing off the 
fat rendering 
from yesterday.
***********************************

I also finished off the fat rendering, but I still have to pack it away in the freezer..
This morning, the fat had set in the larger pan....
I scooped out the clean fat into a smaller pan and was left with a layer of dirty fat and water....
This I strained and poured into a small pan. 
All the leftover waste goes into a bread bag, 
and into the freezer until rubbish night. 


 Once I had just clean fat, I rendered it some more, adding water again...
I let this reduce to get rid of most of the added water.

 Then poured the oil into the containers as shown.
I poured it out while each container was on the scales...
that way each lump of fat will be easier to calculate when weighing it for soap. 
Once frozen, I will remove the containers and store each blob of fat
 in a freezer bag. That way I get all my containers back too.


I found I only needed 1 jug of boiling water to clean up the yucky oily greasy pot.
If you need to clean a pot like this..
Pour 1 kettle of boiling water around the inside walls of the pot.
Place the lid on and leave to melt down the greasy mess. 
Then pour the now warm water over a sieve. 
This will catch any bits left behind from the original fat.
Once empty, I rubbed the whole pot with baking soda...and used a soapy dishcloth to wipe it down. 
rinse well, and dry with a tea-towel.  
Too easy!!!!

***********************************
Preserving Lemons -
another ingredient
to add to your stockpile.
***********************************
While browsing through some of my old recipes...
I found a recipe for Preserved Lemons.
 I haven't used these in cooking since I was in a unit in Wangaratta.
Wow, that was way to many years ago to mention...lol.
So I decided to preserve some lemons myself. 
When lemons are in abundance like they are now (in the shops anyway) 
it's a good idea to stock up and add them to your stockpile by preserving them. 
Especially if you have a lemon tree.
I picked these up for $2 a kilo, while just a few weeks ago, they were $8 per kilo.

Select a glass jar with a secure lid...
preferably not a steel lid, as the heavy salt may react with it. 


Wash your lemons well, I used warm soapy water. 
My soap that I make.
You can see the brush in the water, 
I rubbed the lemons on the brush to remove any blemishes or marks....


Rinse well, in a water bath with half a cup of vinegar. 
This will neutralise any soap residue left on the lemons. 
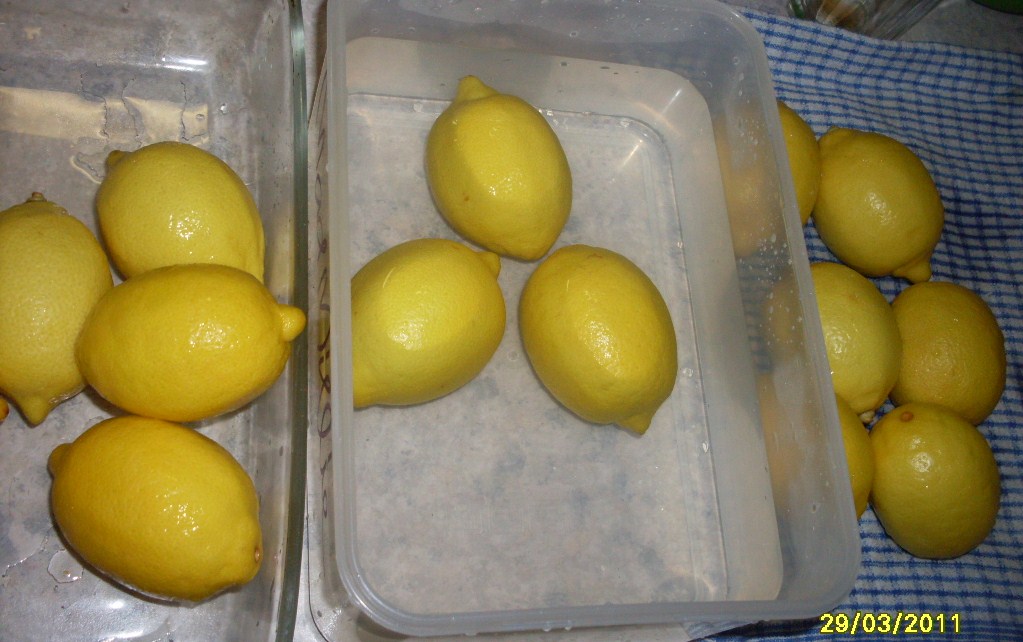
Soapy                               Rinsed                    Draining
Spices used were Bay, Cinnamon, Star Anise, Cloves & Peppercorns. 


I found it easier to decant your spices onto a plate, 
as your fingers are going to get covered in lemon juice and salt. 
This way you are not contaminating your spice jars. 

 Cut the ends off each lemon, and cut into quarters,
 but don't cut all the way through the other end. 
Fill each lemon with salt, 
I just used cooking salt, it's going to dissolve anyway. 


Pack the jar tightly, and add spices as you go. 
Fill smaller gaps with quarters. Add salt and spices as you go.

 Here is a photo of the jars of lemons, just before I filled them with lemon juice
You can see that the salt is already drawing the juice out of the lemons...

Me being the frugal one...I also made a smaller jar using all the cut ends...
I LOVE NO WASTE!!!

When using preserved lemon in a recipe: 
Select a piece of lemon from the jar
Rinse well with fresh water
Remove the flesh from the rind
Discard the flesh, and use the rind
Cut into fine strips or refer to your recipe.

So why not preserve the ends too...that's the bit you use.


***********************************
On to my fourth dishcloth
***********************************

I am still using up all the smaller leftover cottons from Mum....
she crochet's around face-washers and tea-towels
and has had a few bits left over.
so far my cotton dishcloths have cost nothing. 
I am using the one on the left and the centre one.
I have decided to keep on knitting
I may even use them for Christmas gifts.


Mum says she can see my confidence has grown...
she see's me taking my eye off the needles while talking to her....
I didn't even know I was NOT watching all the time.


Hope you all had a great day...
Mine has been a productive and busy one again. 

I guess soap is next...seeing I have all this free oil...
I even have the local chip shop saving Cotton Seed Oil for me
I picked up 4 litres off him the other day to make soap.
Thanks Paul.

If you like what you see, or would like to ask a question, 
please don't hesitate. Drop me a comment, and I will get back to you.


Monday, March 28, 2011

RENDERING FAT & BOKASHI BURIAL & OOPS CHEESE

While I have been ill, there have been a few new followers, so I welcome you to my blog
I hope you like what you see and read. 


I am sure you will be pleased with today's post.
It sure has been a busy day......I'm feeling much better, 
and looking around, there is so much to do....
things I should have been doing but didn't have the energy.....

First off I had fat to render that I had gotten from my new friend Colin the butcher......
and as it was frozen, I thought I would give my new mincer a try...
I have had my mincer for almost a month...but not used it yet as I haven't had time or been too sick.  
I picked this up at Aldi's for $99. 
So today I began rendering the fat. I was disappointed with the amount of waste left over with the last lot of fat I rendered; so I decided to give the mincer a go.....and ground the fat to a fine grade. 
These smaller pieces should prove easier to render.


Mincing the fat before rendering.

For cleaning up the mincer attachments....I came up with the idea of placing them all in boiling water..
This; I hoped would make all the fat dissolve off the attachments and rise to the top of the water....
It worked....Yayyy

Below: I then rubbed baking soda all over the attachments.....straight on the bench that I had the mincer on....which was still greasy....then rubbed the baking soda all over the bench to soak up any fat residue....
It worked tooo!!


Then I washed the parts in warm soapy water, dried them, sprayed them with olive oil (to prevent rust)..
I have seen that some parts can be susceptible to rust, not sure of this model, but not taking the risk.
And have now stored them in a plastic bag...and sealed it.

Here is the oil, simmering away.....I will probably simmer this all day and evening.........
I will write more about these steps, once I have finished rendering.


*****************************************************
TIME TO BURY WHAT'S IN THE BOKASHI BUCKET

First I went and dug the hole in the compost....this is where I buried all the mushroom stems a few months back....the soil in here is so good. I am really impressed with the quality.


 Collecting the last of the Bokashi tea
which will be used on the strawberry plants, Aloe Vera & Kiwi Fruit plants. 
Such spoilt plants.


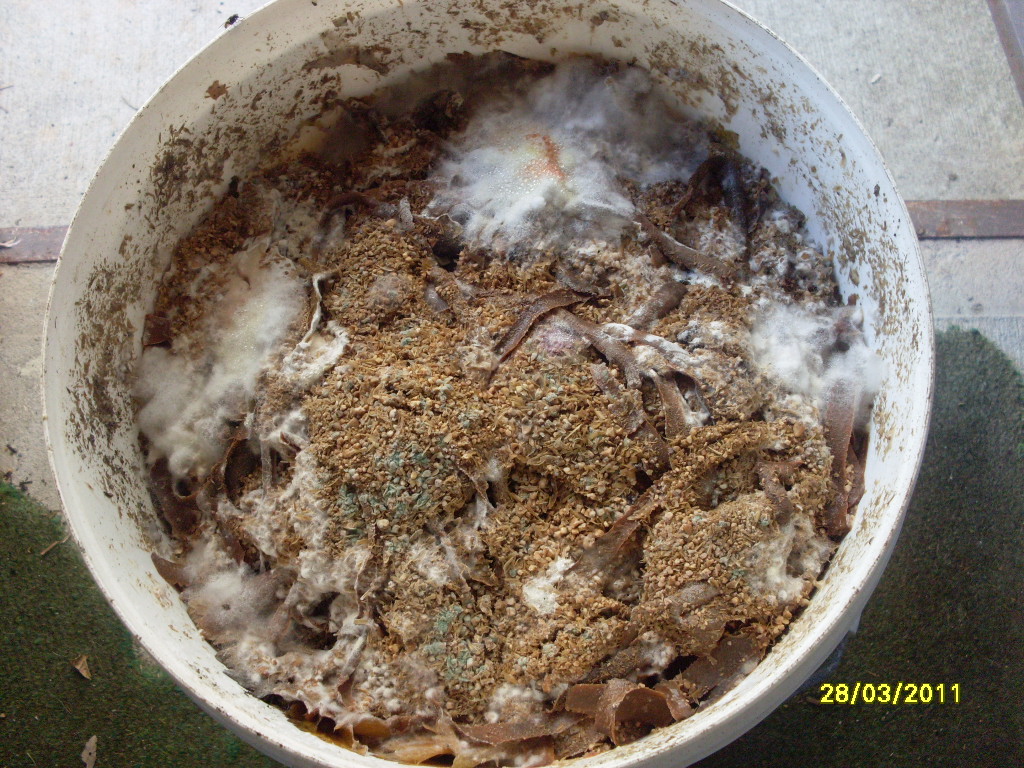
Below: you can see that unwanted mould is starting to develop here....
It is definitley long over due....to be emptied. Surprisingly it doesn't smell offensive though...I can smell a fermented aroma, but certainly not offensive.


 It was so heavy, while I was trying to upend the bokashi bucket,....it sort of just fell like this.


Spread the bokashi waste over the entire pit.


Now cover the Bokashi waste with compost or soil.


 Ahhh more Bokashi tea..... and clean up was so easy!


******************************************************
MY OOPS CHEESE......First of all, let me tell you that I began making a double batch of  Parmesan Cheese yesterday....I found that my rennet was not up to scratch..My milk did not set!    
Last time I used it, I had left it out of the fridge for 24 hours, accidentally packing it away in the cupboard....
I guess I killed my rennet..:(
Not sure about the cultures as they were in the same container :(
and not chilled for the same amount of time   :(

Yep It didn't work, so I saved it by doing the following...............

***************************************
 OOPS CHEESE #1 - Whey and Milk Ricotta
***************************************

I used some of the milk that didn't set properly from the Parmesan Cheese to make this Ricotta.
I also added the cream I had skimmed from the Parmesan Milk and some whey from another cheese. 
I think it will end up a baked Ricotta...this will be a first for us.

First add half a spoon full of baking soda to the milk.....
Then heat the milk/whey/cream to 65 degrees celcius...do not stir......

 When it gets  to 65 degrees C, add 1 tspn of salt to every litre of liquid.........still don't stir.....

Leave it on the heat, and once it reaches 85 degrees C, add 20mls of vinegar per litre.....
don't stir, 
the particles are very small at this stage and rather delicate.......
After adding the vinegar, leave on the heat for another 5 minutes....don't stir.....
 Turn the heat off, and gently remove the curds from the whey....
place all the curds into a strainer lined with a clean cloth.

After all the curds are removed.


Wrap the curds in the cloth, and place a lid on top.

Now wrap up the curds, and place a lid on top, 
Place a bowl on top of that, and fill with water....this acts as a press. 

Once pressed, unwrap and place on a plate....I am going to bake this one.
I have never baked Ricotta before.

Update on the Baked Ricotta

Here is my Chabichou Cheese, and Pressed Ricotta
I am using the infused oil from the Chabichou to fry the Ricotta.....
but you could use any infused oil or even plain oil.

I decided to fry the Ricotta instead of baking it. Much easier this way.


 Hmmm it's smelling good from here.....


Oh no!!! a little bit broke off the side,.....I guess I will just have to try it...
.OMG it is so yummy
Another COOK'S TREAT!!!! heheheheh

****************************************
OOPS CHEESE #2 - nellymary's lemon cheese
Yep, tweaked again.
***************************************

I first strained some more of the milk overnight in a cloth bag, 
thinking I could make some yoghurt....but duhhhh!!! 
I used a cheese culture, not a yoghurt culture....
so cheese it is....but I will tweak it...nellymary style...


So added to this lot, some Lemon Thyme, salt, Lemon rind

 and Lemon Juice, just a half will do.

I have put this into a mould to drain....not sure if it will work,
but I have salted the top, to help draw out the whey.....
once I turn it over, I will salt that side as well....
Leaving it overnight to cure.
I am not expecting a hard cheese, but semi soft will do....
But I will have to wait until tomorrow to see how it is going.

See, it just goes to show, even when you think your milk can't be salvaged because your 'cheese' is not going according to plan.....sit back, have a think about it, and just try something different.....
You never know....
Throw nothing out!!! that's my motto.
**********************************************
NOW TO THINK ABOUT TEA.....
BAKED CHICKEN PIECES
WITH VEG PATTIES & BAKED RICOTTA
**********************************************

The vegetables are from last night, I prepared more than needed to help with tonight's dinner.....
I love mashed potato with a bit of pumpkin....but I didn't have fresh pumpkin on hand.......
So out of the freezer, a bag of frozen cooked pumpkin...to add to the mash...That was last night.

When I have lots of pumpkin, I cube it, and place in the steamer....
then into plastic press-seal bags goes 1 cup of mashed pumpkin....
I add these 1 cup serves to the freezer for 
recipes like my mashed spuds, 
but especially for muffins or scones, Oh they are soooo good.

I also do this with Banana's, and even though they are expensive at the moment, I can make banana bread, or banana scones....or even muffins, on the cheap, because of my stockpile in the freezer.

Leftover veges and Mashed Potato with Pumpkin.
Back to dinner, I just add all the veges into the whizzer to roughly chop them all  to combine them.
Place in a mixing bowl, add a few eggs, 
some plain flour, herbs and spices, some chopped spinach from the garden, 
and Oh! I forgot the grated onion....Oh well. 


Now shallow fry spoonfuls....
and flip when golden. 
If the oven is on, place them in the oven to keep warm until all the mix is used.


Not a bad dinner, everyone enjoyed it....Pretty cheap too......

Baked Chicken Pieces
with Veg Patties and Baked Ricotta

*******************************************************
I also did 2 loads of washing and even had time to plant out the Lemon Thyme and Perpetual Spinach.

 
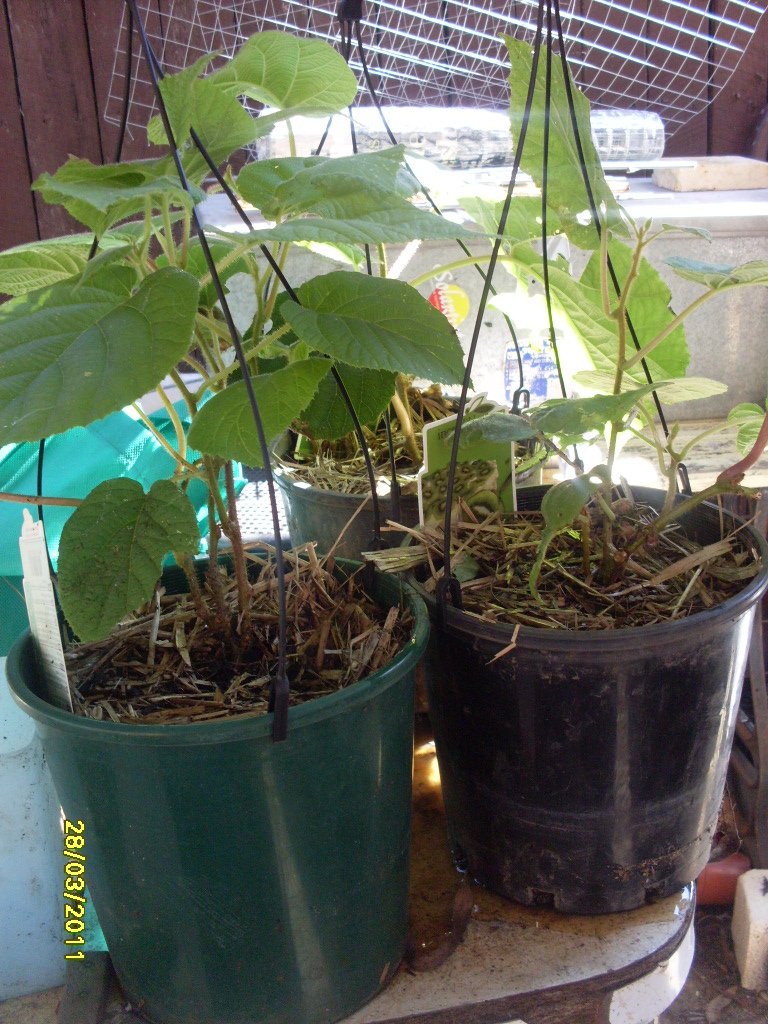
Some Bokashi tea for these plants and even some for the Kiwi Plants, which are happy since being transplanted a few weeks back.
  I will look after these until they are strong and bold, before I planted them into the ground.

Here is a visitor I found....look closely and you will see his web takes up the entire photo.

I will leave you there for now, my little friend, 
but you will eventually have to move on.

I sure hope you enjoyed reading about my day.....
It was a busy one, and it's good to be feeling healthy again.
If you like something I did, please leave a comment.....
I would love to hear from you.

Oh, I forgot to check the Camembert, I think it needs to be wrapped.....
Ahhhhh tomorrow's another day...
zzzzzzzzzzzzzzzzzzzzzzz

Wednesday, March 16, 2011

THERE'S TOO MANY CONTAINERS IN THE WORLD.....

I'm always trying to careful with what containers are coming into the house, if an item isn't bought in bulk, what other ways can you use the container, once it is empty? I do store empty containers, sometimes not even knowing what they can later be used for.....There is just too much landfill in the world and its time we really started thinking about it, one household at a time.

Today I decanted Baking Soda into an old powder container. Always label a new container VERY CLEARLY. There must be no misunderstanding as to what is inside the container. The blue powder container in the background is being thrown out because after pulling the lid off, it cannot be pressed back on. What a waste of plastic. In the past I have been known to buy carpet deodoriser,  (which I will also use for baking soda), but now I am thinking more clearly with what I buy, I am using up what I have in the house, and slowly converting to more natural and simple cleaning products. I have paid money for the products still lurking around the house, so better to use them up, and then convert to the more simple products, slowly converting the rest of the members of the house along the way. I even store rice and other foods in cordial bottles, my husband doesn't like home made cordial. 

I checked the price of sugar and salt shakers for my baking soda, which were between $5 and $9...I guess my powder shaker will do well at my sink...heaps cheaper than the fancy one. 

I'm not up to date with greenhouse gases, and climate change. While these words don't come easy to me, I still wonder about all the natural destruction happening in the world, is it us to blame, have we done so much damage to the world it is now beginning to show its wrath?  I know a lot of work is being done to help 'repair' the planet today and I think recycling is the future...It needs to be taught more in schools.....Today it is covered a lot more than when we were children...although a childhood memory of recycling comes to mind.............

I can recall collecting aluminium cans and soft drink bottles for pocket money.....There were many times when us kids, including the neighbours; would go door knocking, asking for empty 'glass' soft-drink bottles...The bigger kids would push the wheelbarrow, once it was full, we would take them to the supermarket to be exchanged for cash. Us kids could eat lollies for the whole weekend....we had pic-nics under the neighbours trampoline and there was always plenty of soft drink and lollies for everyone to enjoy the whole weekend......

Recycling containers for other uses.
Think about the container you are buying, not just the product.
**********************************************************

ATTENDING TO MY VINEGARS

Today I am adding to my collecting of growing vinegars....I am so impressed at how easy this can be to do. I traded some red wine with a new friend from the course... she is going to give me some home made tobasco sauce...Yummm.....

Left: Both jars had the same amount of red wine to start with,
Right: shows after the wine has been topped up with vinegar.
also shows the mother has been added.

Clearly label, include the type of wine and the date. 
 As it was day 8 for the fruit vinegars, I also strained them, and added a vinegar mother to them. 

 The aroma, so far is lovely, I even tasted the pineapple vinegar, and it won't be long before I could use it. It is a nice flavour now, and still not matured fully yet. I will be adding vinegars to my cooking and salads so much more....I think I will be able to illiminate buying salad dressing altogether.

After straining, I added vinegar mother, then topped up with white vinegar

Place gauze on rim of jar and place in a cool cupboard to mature. 
*******************************************************

CHEESECAKE FROM QUARK
From the quark I made in the cheese course, I made two cheesecakes...it was really simple....adding all to the  whizzer to mix quickly. I had found a few pastry cases on quick-sale, and decided to use them for this purpose. 


As we were all fairly full from tea, we shared half a cheesecake with some home-made ice-cream.....plain cheesecake was delicious....especially with the ice-cream. We haven't had ice-cream in the house for years.
For tomorrow night's cheesecake I will probably put some frozen berries on top...I get them when they are marked down and either dehydrate them or freeze them....will have to see what I have in the freezer tomorrow, it won't need many.....
The other cheesecake will go back in the box the base came in, and be put in the freezer as a quick dessert.

******************************************************

HOME MADE ICE-CREAM

I have been thinking about this Peach Ice-cream ever since Rose put it on her blog....So thanks Rose for the inspiration, however I only had one peach.
A recipe can always be a compromise....I never had 4 peaches. 
My ice-cream was made up of 
1 peach, 1 nectarine, 2 chopped frozen bananas. 
Yep, using what you already have is the way to go....I didn't have enough lemons to make the 1/2 cup of juice , so I substituted the rest for lemon juice ice-cubes from the freezer. 
Some fresh, some frozen..

2 chopped frozen bananas, 1 peach, 1 nectarine, 1/4 cup caster sugar, 1/2 cup lemon juice
mash to a pulp and cool for 2 hours.

 Strain fruit pulp and seperatly mix 1 cup milk and 2 cups cream.....keep milk mix cool. 
Add fruit juice to milk mix and stir well. 
 Add whole mix to ice-cream machine and mix for 25 minutes...then while machine is running, add fruit pulp and mix for another 10 minutes.Place in freezer to freeze completely.

Oh soooo yummy. 

Hope you had a good day too. I would love to hear what your plans are for the day.

Related Posts Plugin for WordPress, Blogger...