WELCOME to my BLOG

Hi there!

I’m slowly working towards some simplicity within the home, but hey! It’s a lot of hard work!

I love having a go at growing my own veges and always use herbs fresh from my garden. I try to plant from seed whenever I can and have learnt to save and share my own seed for the following year. I make Award Winning preserves and pickles; and my husband brews Award Winning boutique beers as well. I love to stockpile and try to limit quick trips to the shops. I dabble in bread making and enjoy making my own stocks too.

I enjoy feeding my family good hearty meals, nothing like those tiny restaurant stacks you have to look for on the plate. My husband maintains our vehicles and machinery and we both enjoy fabricating on a small scale mostly relying on metal & timber recyclers for any materials needed.


While I don’t always have time to reply to comments, I love reading them. I hope you enjoy your stay and I hope you learn something new because I love sharing what I learn, and I'm always looking for another new skill myself.

Cheers!

Saturday, March 31, 2012

Dog Food home-made

Over at Down to Earth, Rhonda makes her own dog biscuits and dog food....We love giving our Rusty and Cindy treats...(You can view some action photos of the girls here) and what better treat than something that's good enough for US humans to eat. Well....you know what I mean......I have made dog biscuits in the past for my two little dogs, and they love them.....But............

Our Cindy (miniature black & white Jack Russell) just had some major dental work done with 13 teeth being removed...(she already had 9 missing).....I've had to rearrange her diet. With our home-made biscuits being far too crunchy now for her now.

The other day, I bought trays of liver and kidneys....and two trays of cheap minced beef. I had beef and pork bones in the freezer to make some serious stock once home. I forgot to buy chicken carcasses....so it's just beef, lamb and pork for this batch.

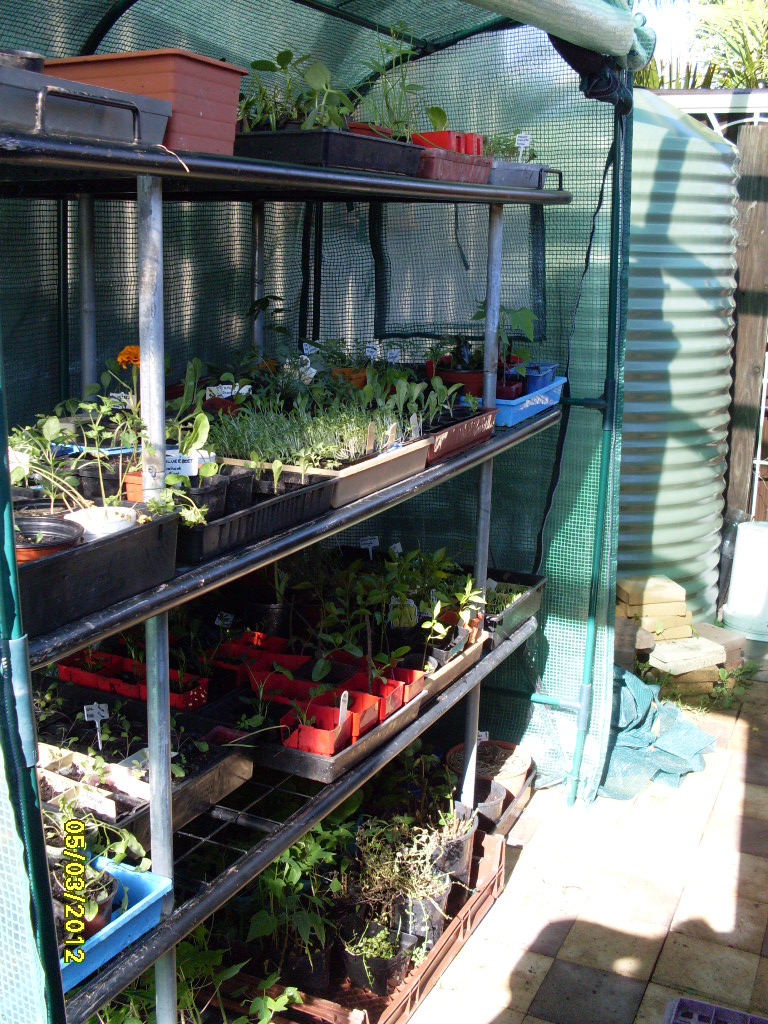
Once I had a pot of stock brewing, I got on to chopping up veg in the whizzer to add to the dog food....I was also chopping veg for coleslaw and soup for the community garden...so one mess for three different projects. Brilliant!!

To make the veg fine for the dog food, I put it in the whizzer and added some stock from the stove (in batches)....this makes the veg move around the blades easier and get chopped up nice and fine. I also did this to cut up the kidneys and liver. (Thinking that Cindy won't be doing much chewing, I kept everything fine). Each batch then got put into the big boiler pot, along with the two trays of browned off minced beef.

A good heaped cup of rice, as well as small pasta was also added to the meat and veg mixture.....I then added a few heaped dessert spoons of garlic powder (good for keeping fleas at bay) and more dried herbs..(there was lots of herbs in the stock too)....Covered with the stock I made earlier, it was all left to simmer for a few hours. I also thickened it with some gravy powder.

My cooking was cut short with a huge fall in the kitchen,  catching my toe on a milk-crate I had bought into the kitchen to sit on to get down in those deep corner cupboards.....(bugga! those cupboards, bugga! that milk-crate)......Once I was able to get up off the floor, I got DS17 to turn the stove off, while I hobbled off to lie on the bed and he went and got the ice-packs.....All I could keep thinking was...."Hubby is on his way home for the weekend....and I'm going to spend my time in the hospital having x-rays". The ice immediately paid off...because this morning I woke feeling very sore,  but I really don't think I have broken anything. I certainly done some short term damage with my bad leg, as I feel like I'm walking in a moon boot again.....I definitely hurt an area on my leg where there are screws and a plate....with pain in the same area where I broke my leg last year.....don't worry, I will keep an eye on it. 

So....the following morning, I found how thick it had turned out....lovely! For my puppy dogs anyway! It actually smells pretty darn good...and the dogs were circling while I was packing it all up for the freezer. I decided 3/4 cup for each dog, but froze it in double batches.
This pot was full to the top.

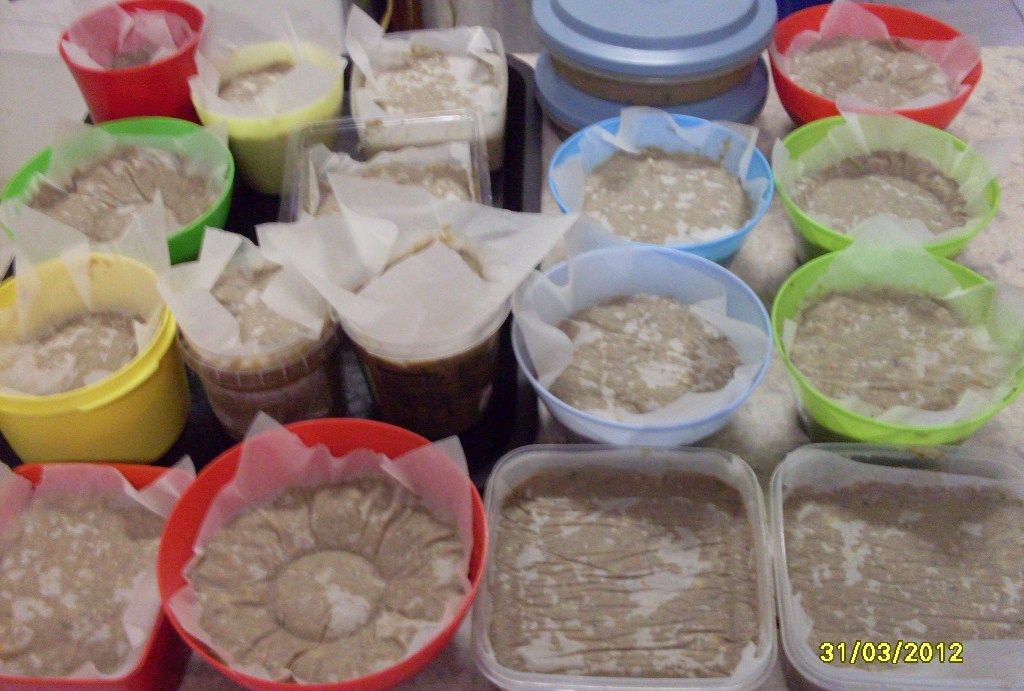
19 meals for two little dogs.
After dividing it all up...I got 19 days of food for both dogs. Which is fantastic because I don't plan to give it to them every day...supplementing with other foods or leftovers. And they will still have a bowl of mini dry biscuits to graze on each day.

Do you make your puppy dogs their own food? 
What's your favourite recipe? 
If you have blogged about it....leave a link to the post
I'd love to read about it.

Sunday, March 18, 2012

Wholemeal bread - a triple batch

I love making bread! Once you master it...your confidence grows even more to try other breads. When I make bread, I usually form it into rolls which is easily divided come meal time. Some favourites at home are our Kefir Milk Bread Rolls, Ground Soy Linseed and Almond bread and even the good old traditional white bread. I've even had a go at making Baguettes, but these recipes on my blog have all been using my bread machine in some way. I'm not sure I want to use my bread machine any more, as one thing that has always bothered me is the amount of dough for the time invested.......

I want to get the family used to eating my home-made bread on a day to day basis, but  it seems that old habits are hard to break when it comes to the lunch time sandwich......(And I have that extra challenge of making it every day myself, although I think it may be a timing challenge more than anything). When I was a Nanny back in my late teens, I made all the family's bread, but these days, I only make it roughly once a week, and on special occasions.....and it's always gone way too quick! 


For my birthday on Friday I was blessed to received a grain mill attachment for my Kenwood Mixer. So over the weekend I have been playing with the mill and also my lovely dough hook. Ahhhhh the joys of kneading are slipping my mind very quickly as I watch yet another big batch of dough working its magic in the Kenwood. "Maybe I can do this challenge" I think to myself. Maybe it won't be that hard if I don't have to knead the dough by hand............Maybe my family CAN enjoy the lovely aroma, flavour and goodness of fresh bread everyday; like the same that has come out of my kitchen for the last 3 consecutive days.

I've tried three recipes so far for Wholemeal bread...all bulk recipes to suit my Kenwood. I discovered in the instruction manual that the Kenwood can comfortably cope with 1.36kg of flour in making up a bread dough. This gives me more than one loaf of bread for the same amount of prep time. Brilliant!! I'm all for batch cooking as you know.

As I had trouble sourcing grain on Friday morning...I only bought 500g of wheat from the local health food store. This cost me $2.10....so there must be a cheaper way to buy wheat.....but seeing it was the first time I was using my new grain mill....I dismissed the price. (just this once). I have to be sensible about this too, seeing I still have plenty of bulk flour in my store cupboard to use up; but this also gives me time to find a cheaper supplier of fresh wheat, spelt, chia, quinoa, hemp or other grains.
Any suggestions for (bulk) grain suppliers for the Illawarra area would be greatly appreciated!! 
Or cost effective postable quantities ......


****************************
Wholemeal bread........a triple batch! This recipe comes from the recipe book that came with my Kenwood Chef Major....I just tripled the recipe to suit.

1125 grams Wholemeal Flour
225 grams plain White Flour
6 teaspoons salt
4 1/2 teaspoons dried yeast
900 mls lukewarm water

Wow, 5 ingredients.....DS20 looked around for a recycled bread bag from a store bought bread and had to count the ingredient list....19 ingredients....Hmmmm there's something to be said there!

Sorry, I've been blabbing on a bit with this post, but it's been a while since I chatted with you all...lol...so......

Back to the recipe.....
Place the flours, salt and yeast in the Kenwood bowl, and using the dough hook on the minimum speed....gradually add the lukewarm water. Mix on minimum speed until a soft dough is formed.

Knead for 1 minute on minimum speed, then 4 to 5 minutes on speed 1. You are looking for the dough to be smooth (as smooth as wholemeal grain can look anyway)...and elastic looking.  Once the dough is kneaded....cover with lightly oiled plastic film and leave to rise. Best risen in a warm place....If it's a cold day, the perfect climate to rise a bread dough is in the warmth of a closed car parked in the sun.

Once the dough doubles in size........

Knock it back and roll out onto a lightly floured bench. Knead it for a few minutes to knock the air out of the dough.

This is when you shape the dough to what breads you want.....You could make one huge free-form loaf like this......

But this mixture was enough for two medium loaves of bread and 8 dinner rolls. The other night I also made 1 extra large loaf of bread and 10 rolls.

So it's really just up to your imagination or family needs. I can tell you though...that if you have just enough bread rolls to accompany a meal....there's no fights over anyone sneaking an extra slice when your not looking. We have 5 people in our family, so I always make up rolls in lots of 5. The rolls are shared out evenly, but also allocated for meals and NOT hungry teenager snacks. ...It can be frustrating to see all that hard work to be gobbled up in 5 minutes, just because your not in the kitchen when your boys come home....I'm sure you've been there, even with biscuits or cake too.

(Hubby is away through the week now...so this lot is two batches of four...Sorry Hubby you miss out on this lot) .....I did give Hubby a huge loaf to take with him though...... and have since been told that the lady he is staying with insisted they sat down and had a slice immediately ....with my home-made blackberry jam. I'm glad you like my bread Lola!

Weighing the dough out evenly for rolls
makes them bake all at the same size.
Preheat the oven now to 230 degrees celcius.....and allow the shaped dough to rise again....
Ready for the 2nd rise
Now add the rolls to the oven, these will be risen and ready before the loaves.....Bake the rolls for roughly 15 to 20 minutes or until they sound hollow when tapped on the bottom.
Once the rolls are removed from the oven, place the larger tins in and bake for 10 minutes before turning the oven down to 200 degrees....and baking for a further 20 to 30 minutes.  Remove tins from the oven and take the bread out of the tin immediately....allow the bread to cool on a wire rack.

The wire rack is hidden beneath the tea-towel.
I also covered the loaves with the other half of the tea-towel
allowing them to cool before putting away.


I'm loving this wholemeal bread, I can't wait to source some wheat grain, so I can grind my own flour fresh for each loaf.


Do you have a grain mill? If so, what other ingredients do you mill?

Wednesday, March 7, 2012

Saving the fence!

When we moved in, just 8 years ago, we knew there would be maintenance to deal with. Sure, that's part of owning your own home. There have been many changes over those years with some busier than others. I've built complete walls in the garage, storage shelves too....I even built a built-in-robe in our bedroom. Although it hasn't got the doors on it (yet), it's still somewhere to hang our clothes.....and that's something we didn't have at first.

The land in the back yard has been built up, levelled out and paved to the far fence to make the ground not so steep. If your weren't told how deep those back garden beds were, you would never have guessed. There's 12 tonne of road base under those pavers out there, as well as 2 tonne of sand. I'll give you one guess as to who transported it all into the back yard by wheelbarrow (before my bone disease) At the end of Hubby's work day, he would also help with a few barrow fulls, but by then it was time to finish up for the day.

When we were looking for a house, like other first home buyers, we had expectations of what was needed. First priority after affordability and bedrooms etc; was that there had to be room for Mum to build a dwelling in the back yard. After looking at over 50 houses, and losing out on one house, we finally put a bid in for the home we live in today.

I love our home, it's not fancy, there's no style...because I have no sense of the word...(lol), and it's not huge and new like the double story houses that are popping up in the new estates around here. If you go for a drive in a new estate roughly 12 months after the houses are built...You would be amazed at how many of the freshly completed houses are up for sale. Why so quickly? I can't help but think if the young couple bought outside their budget and were living beyond their means.

You MUST live beneath your wage, otherwise there is no true way of earning and saving ANY money.

I see and hear of it all too often around here, people buying a huge house, adding a lovely new car to the mortgage, and while they're at it, adding a pool too. It's like free money when it just gets added on to the end of your mortgage. But it couldn't be further from ideal. It seems there is a reputation of new mortgage couples want it all today. I'm talking of the lovely huge house, the new car, the new swimming pool and possibly a boat if they enjoy fishing. Most of the new houses don't have access to get a boat out the back yard anyway. What about other scenarios like including a huge salary sacrifice if the newly weds become pregnant and one parent has to give up work early. All of these possibilities can spell trouble if you buy above your means.

When it comes to repairs and maintenance on the family home.....
The more you can build, repair, replace, grow and cook....the better off financially you will be. Whenever we find a new breakdown to add to that ever evolving list of household tasks, we try to do the work as soon as possible or as soon as we can afford it. I know we  have saved thousands in work labour alone, having done most of the work ourselves. (Except for when I was really ill, stuck in bed with my Bone Disease ).

This brings me to Repairing the Fence!......
With two fence posts completely rotten at the base...2 whole fence sections have been on a lean that has been  propped up for too long....That has all changed now, and has been corrected. Shopping around at the metal recyclers...We found enough angle iron to repair the side fence. Both my boys helped me with all the work.

*First you need to clear the soil from around the problem post/s....
*Then break up the old concrete from around the post....We hired a Jack Hammer for this job and I took small turns with DS17 and DS20....I was extra proud of my boys and the work they did that day. Although this is a very labour intensive job, it does need to be done, because wet concrete does not stick to dry concrete. (sorry for the bad news)....
*Cut away any dead rotting timber from the base of the posts....
*Measure and cut angle iron to 1 and 1/2 depths of the hole dug....
*Pre-drill the angle iron to the correct size of the bolts chosen....
*Pre-drill the timber posts while holding the angle iron on the post and pulling the fence back into alignment....


*After mixing 'quick mix concrete', pour it into the hole....
*Pull the fence post into alignment and place the angle iron in the future spot that will fit with the timber post. You can judge this by temporarily screwing a few bolts into the post and angle iron. Gently allow the fence to fall back away from the angle iron...it's critical at this time that the angle iron does not move in the wet but setting cement....then allow 24 to 48 hours for the cement to set well....
*Once the cement is well set, pull the fence post into alignment with the angle iron that is set in the concrete....
*While someone is holding the post in place, have someone else put the bolts in. Then screw them in tightly....


And there you have a fence.....all fixed! 


It's much cheaper than replacing the fence...The fence is fine for many years to come...it was just the timber that is in the ground.....when the others go, they will be repaired the same way. I hope you can save some money by doing a fence repair this way.....There's still some life left in the old fence!

Tuesday, March 6, 2012

More progress in the garden!

First off the ranks...I need to let you know that the carrot experiment wasn't a success. Upon inspection the very next day I noticed the carrot lid was to the point of popping off. It was bulging like an explosion was on the horizon...lol....So when I opened the lid to release some pressure....this is what happened....all the fizz came flooding out of the jar.....as I'm not sure this is what is meant to happen, I've tossed the carrot. Carrot NIL...Beans still going........Oh well...worth a try hey!


*************************************
As I have never grown zucchini, I just had to show off what I picked...
but there is something much more exciting than this to show you.....

*************************************

Check this out...We finally finished the front garden bed...Phew...what a job! But it is sooooo worth the work, to think that it will provide us with fruit in the future...and plenty of space beneath for the odd vegetable or herb too. I knew that when we finally filled in the bed, I would have an instant garden; because I have been planning it so long...and hoarding plants in pots out the back too.


So when it came time to planting out...I had  grown from seed or cutting...... Comfrey, Nasturtium, Rosemary, Lavender, Violets and Pyrethrum. I also have a pot of Thornless Blackberries shooting, which will go on the fence later on. I've been buying dwarf fruit trees in ready for freshly built garden beds...I have planted out the dwarf Washington Navel Orange, a dwarf green Apple and a dwarf Seedless Valencia Orange.

Remember, any work you do now, any planning and planting in your garden, is an investment for your future. When I look to the future and I imagine the 'fruits of my labour'....I get excited. 

Over the back behind the Feijoa tree, I planted the triple grafted Apricot tree which I bought for hubby for Christmas. Apricot is his favourite fruit.
In the original garden bed in the front yard, the Taro and the Rosella are very happy. It won't be long before I start seeing new buds on these Rosella.

*************************************
More exciting progress....Hubby was busy on Sunday too, while I was pottering away in the new garden bed with even more plants. .....We had finally sourced enough materials to build a shelving unit for the hothouse. It's only a cheapy from Bunnings, but it gets the job done! The shelving is made up of some bed frames...and some pipe from what we think was once a trampoline cage. I'm so impressed with the shelving...it's made to fit...and without including the ground floor, it can hold 30 seedling trays. That's awesome!

I don't need to put up with the balancing act of the milk crates, and wire mesh now...which was only the floor and one shelf anyway.....OMG I can't believe I filled it...lol....but I do raise plants for the community garden as well as cuttings and seed for the free table at the garden course...along with my own garden needs of-course...Yep, I filled it easy!

*************************************

One day down the track, we will learn how to graft multiple varieties of fruit trees onto one tree...so I'm planning ahead and growing my own apple trees....They still have a way to go...and I still need to germinate a few more varieties...but this is a start.


With all the rain we have been having...the perennial beans have gone wildly crazy.....they are taking over everything...and to think....there are only 3 plants. They haven't begun to flower yet, but Richard says not to worry, because all perennial beans take longer to flower.

The front 
I just looked back on when I planted them....mid September Wow! Is it meant to be that long before I get flowers or should I pull them out? I wonder?  Richard....you out there? 
The back
Even the side is being taken over.
This trellis was meant for the passion-fruit vine on the left.

This cucumber is really determined to live...so I've treated it kindly, and propped it up....given it some old horse manure...and planted two Mini long Egg-Plant in the front.


The Jerusalem Artichoke are going strong and I can see some flower buds on them now. The same at the community garden are in full flower...but also in full sun...so I will plant them in the front yard next season.

****************************
The Water Garden
Every time it rains, the water garden (the neighbours old bath) overflows....which is because I haven't yet gotten around to drilling a over-flow hole in it yet.
I use the Azola to add nitrogen to the compost bin...but I haven't had the the need to add wet ingredients with all this rain. Azola is a fantastic compost generator...and it seems to be enjoying being in this position.
The long reeds are Chinese Water Chestnuts...the fern looking plant to the left is Water Celery and in front of that is the Vietnamese Mint....Scattered all over the Azola is Water Cress, and climbing up the Water Chestnuts is a crazy (PennyRoyal like) mint.

My Water Garden collects the first flush of rainwater from the downpipe.
There's lots of other exciting things happening here at the moment....but I will leave that for another post.

Friday, March 2, 2012

More food experiments........

And to think, I hated chemistry back in school....but with all this fermenting, preserving, growing and baking....I guess I'm into chemistry of sorts....Ahhh...the fun side of chemistry though.....and on my terms too. You have to be a little crazy to like chemistry experiments.....But I'll get back to that shortly.....

So anyway....I was busy in the kitchen again yesterday....with another batch of Tomato Base happening......this time I had tomato, eggplant, carrot, garlic, garlic chives, sage, rosemary, oregano, and leek......Which all got roasted for an hour or so...then put in the crock-pot on low for the rest of the day.

Today I will strain this mix through the moulix...then add chopped rainbow chard, capsicum, zucchini, and squash, and cook until the veg are tender. It will all get bottled up and put in a hot water bath. This will be another addition to the stock pile for the coming year.

(The bold veg is harvested from my own garden...but please don't think I have a huge garden...I've wiped it out again by picking them....and I'll need to wait for more to grow now)


Before adding it all to the crock-pot
For lunch, both Mum and myself enjoyed some fresh sweet potato that I dug up at the Barrack Heights Community Garden. If this is what I'm in for when my plants begin to mature....I'm excited!


LUNCH
Sweet Potato Chips with runny scrambled egg


Onto some experimenting in the kitchen........ While I knew they existed...I had never seen, nor tasted Spaghetti Squash....Until today! Richard donated two of them to the 'free table' at the gardening course last weekend. I quickly snatched one up and felt no guilt at all, jumping in first....lol

SPAGHETTI SQUASH
Yep! I harvested all the seed
and they are now drying for next season
As I have never tried this vegetable...it was a little like doing another experiment in the kitchen....A good one though, because we get to eat the end product....So this is what I did to the Spaghetti Squash....
Firstly, cut the squash in half, then scoop out the loose flesh and seeds......
Spray the tray you intend to bake them on....then select some herbs to place beneath the cut halves...I chose garlic, oregano and rosemary.....I thought this might add to the flavour...which couldn't hurt!......

Then bake in a low to medium oven until tender...which was about 45 minutes for this one on 160 degrees Celsius. Once baked...remove from the oven and scoop out the cooked flesh. Add a dob of butter and some salt & pepper to taste....stir through...and enjoy! We had this as an additional vegetable along with fresh beans again from the garden.....
I think I have found my new favourite vegetable...Now I just can't wait until next season, so I can experiment even more with them....I'm thinking it will be nice added to muffins too....What do you think?

Another experiment.........
this time with Campden tablets.......

Richard over at 'Going My Own Way' lives in South Devon...and he preserves his apples by peeling, chopping them up and simply bottling them with a solution made up of 1 crushed Campden Tablet to 568mls or 1 pint of boiled water.
Testing the apples monthly...after 3 months the apples were still crisp to the bite...and after rinsing well...they tasted perfect. He knows this method from memories of his grandmother doing it....So I guess there's something to be said about listening to our Nan's.
Since learning this method back in September I think...I had to give it a go. With fresh beans from my garden...and a better supply from the Community Garden...I figured now was the perfect time to experiment.

So......To one crushed Campden tablet.(which I sourced at my local home-brew supply shop)...I added 568mls of rain water (OR cooled boiled water) and stirred until dissolved.
I then tailed enough beans to fill one clean but not sterilised glass jar. I left the tops on, so there is something to grab when picking the beans out of the jar....and topped it up with the Campden Water. Make sure that you over fill the jar...as to remove any air lurking. You can also use the handle end of a spoon to move the beans around, helping expel any air bubbles. You will notice that the water level will drop if there was any air left in the jar....just top it up again to overflowing........
After the beans, I still had some Campden Water left over........
so I tried carrots too.....After over filling the jars...place the lids on tight....and wait.
It's apparently that easy!!

I will check on these monthly to see how they are going....If it works...after rinsing the vegetables....they will be as fresh as when they went in the jars.

What was your last experiment in the kitchen?

Have you ever used Campden Tablets to preserve fruit or vegetable? 
What do you think?....

Thursday, March 1, 2012

Garlic seed, Rhubarb & Apple pies & Jumping Johnnies

Ok, so I know it's late in letting you know.....and some of you may have already received them....but the Garlic Seed is on it's way.....(four days ago)...lol. I'm spreading myself a bit thin these days...and blogging seems to be one of the things that is falling behind.....


If your wondering how much seed you are getting....I discovered that each little ball on the flower head is full of seed...so I just measured out 1 tablespoon of the little flower balls..and popped them in a press seal bag. So depending on how many seeds are still trapped in the flowers....that's how much seed you are getting.


I've started a test with the garlic seed, but Richard (my gardening friend) tells me it can take 4 or 5 weeks for the seed to germinate....I covered the seed (not shown in the photo below) lightly with more soil and the pot is in the hall way on top of my recycling station. (If the weather fines up and we get some hot days, I will think about transferring it out to the hothouse) We now have a skylight in the hall, so it's bright and I can keep an eye on them. This spot is working well for storing seed while it is soaking or drying.


On to some yummies........

I recently cleaned out the Rhubarb bed ready to give it a feed....I also found that I need to relocate some of the crowns to fill in some gaps...but that won't be happening any time soon, because of all the rain we are having at the moment. So anyway....I had some Rhubarb to use up......

I have also collected the seed this year from my Nan's Rhubarb plants...If you would like some seed from my Nan's Rhubarb plants; send me an email for my address...then send me a self-addressed stamped envelope....and I will get some to you. I think it's awesome that I am able to share my Nan's Rhubarb plants with others....her Rhubarb lives on......and I think she'd like the thought of that.

Rhubarb & Apple Pies
I cut up the rhubarb and I had some apples to use up from the crisper....and stewed them both together.....added a little bit of sugar to taste....and then I had the perfect pie filling. Using Nan's recipe for pastry again....I began assembling the pies....(if your wondering...yes, I re-use my foil pie trays)


What a mess............
but only because I shoved the trays on the bench for the photo...lol
Having just enough stewed fruit for one last pie....I couldn't see the point in having the oven on for one pie.....so I made some open pies....by blind baking the pastry flans....then dividing the fruit mixture between the four flans....They weren't very full...so I sliced up some pears and placed them on top. A few circles of pastry later....and a wash of milk before going into the oven.....yummmmmm

Not bad, not bad........


Pictures for the Jumping Johnnies.............


Yep, Jumpin' Johnnies again.............If you have been following my blog for a while, you will remember my saga with the Jumping Johnnies recipe......I finally have photos I can share with you. You can also find a printable version of the recipe with 4 copies on one page...so you can share the recipe of-course with your friends. I will also update the recipe pages with these photos so that the photo's are with the recipe.


I had a lovely response from my last post, wondering what others are up to....so I will ask again....
Have you been baking?.....Tell me what you've been up to in the kitchen. 
Maybe you've been busy in the garden?........
If you have a blog and have posted about it...leave a link with your comment...I'd love a peek.

Related Posts Plugin for WordPress, Blogger...