WELCOME to my BLOG

Hi there!

I’m slowly working towards some simplicity within the home, but hey! It’s a lot of hard work!

I love having a go at growing my own veges and always use herbs fresh from my garden. I try to plant from seed whenever I can and have learnt to save and share my own seed for the following year. I make Award Winning preserves and pickles; and my husband brews Award Winning boutique beers as well. I love to stockpile and try to limit quick trips to the shops. I dabble in bread making and enjoy making my own stocks too.

I enjoy feeding my family good hearty meals, nothing like those tiny restaurant stacks you have to look for on the plate. My husband maintains our vehicles and machinery and we both enjoy fabricating on a small scale mostly relying on metal & timber recyclers for any materials needed.


While I don’t always have time to reply to comments, I love reading them. I hope you enjoy your stay and I hope you learn something new because I love sharing what I learn, and I'm always looking for another new skill myself.

Cheers!

Showing posts with label Rhubarb. Show all posts

Thursday, March 1, 2012

Garlic seed, Rhubarb & Apple pies & Jumping Johnnies

Ok, so I know it's late in letting you know.....and some of you may have already received them....but the Garlic Seed is on it's way.....(four days ago)...lol. I'm spreading myself a bit thin these days...and blogging seems to be one of the things that is falling behind.....


If your wondering how much seed you are getting....I discovered that each little ball on the flower head is full of seed...so I just measured out 1 tablespoon of the little flower balls..and popped them in a press seal bag. So depending on how many seeds are still trapped in the flowers....that's how much seed you are getting.


I've started a test with the garlic seed, but Richard (my gardening friend) tells me it can take 4 or 5 weeks for the seed to germinate....I covered the seed (not shown in the photo below) lightly with more soil and the pot is in the hall way on top of my recycling station. (If the weather fines up and we get some hot days, I will think about transferring it out to the hothouse) We now have a skylight in the hall, so it's bright and I can keep an eye on them. This spot is working well for storing seed while it is soaking or drying.


On to some yummies........

I recently cleaned out the Rhubarb bed ready to give it a feed....I also found that I need to relocate some of the crowns to fill in some gaps...but that won't be happening any time soon, because of all the rain we are having at the moment. So anyway....I had some Rhubarb to use up......

I have also collected the seed this year from my Nan's Rhubarb plants...If you would like some seed from my Nan's Rhubarb plants; send me an email for my address...then send me a self-addressed stamped envelope....and I will get some to you. I think it's awesome that I am able to share my Nan's Rhubarb plants with others....her Rhubarb lives on......and I think she'd like the thought of that.

Rhubarb & Apple Pies
I cut up the rhubarb and I had some apples to use up from the crisper....and stewed them both together.....added a little bit of sugar to taste....and then I had the perfect pie filling. Using Nan's recipe for pastry again....I began assembling the pies....(if your wondering...yes, I re-use my foil pie trays)


What a mess............
but only because I shoved the trays on the bench for the photo...lol
Having just enough stewed fruit for one last pie....I couldn't see the point in having the oven on for one pie.....so I made some open pies....by blind baking the pastry flans....then dividing the fruit mixture between the four flans....They weren't very full...so I sliced up some pears and placed them on top. A few circles of pastry later....and a wash of milk before going into the oven.....yummmmmm

Not bad, not bad........


Pictures for the Jumping Johnnies.............


Yep, Jumpin' Johnnies again.............If you have been following my blog for a while, you will remember my saga with the Jumping Johnnies recipe......I finally have photos I can share with you. You can also find a printable version of the recipe with 4 copies on one page...so you can share the recipe of-course with your friends. I will also update the recipe pages with these photos so that the photo's are with the recipe.


I had a lovely response from my last post, wondering what others are up to....so I will ask again....
Have you been baking?.....Tell me what you've been up to in the kitchen. 
Maybe you've been busy in the garden?........
If you have a blog and have posted about it...leave a link with your comment...I'd love a peek.

Monday, November 28, 2011

Rhubarb & Mint Jelly

Well, it seems that if you add enough sugar, anything can taste good....even Rhubarb. It makes me wonder if Nan or Mum ever put sugar in their Rhubarb and Apple....It was far too tart for my liking....and until the other day, I thought I would never like the taste of Rhubarb. I guess it just depends on the way you serve it!

For those who are wondering what book these recipes came from, the book is called ......
"Preserves" by Catherine Atkinson & Maggie Mayhew.
Published by "Hermes House, an imprint of Anness Publishing, Wigston, Leicestershire LE18 4SE"
ISBN: 13 :  978  *  1 *  84681  * 571  *  3
ISBN: 10 :  1  * 84681  *  571  *  3   (sorry for the funny asterix's, the pc was picking up that this was a code if I typed it correctly.)


Here is a photo of the front cover....I picked this book up at a newly opened book store in Warrawong, where all the books were $5.00 each. I think this is a reasonable price for a comprehensive book like this.

Rhubarb & Mint Jelly

Sorry for those who prefer to print the recipe by copying and pasting....this looks a lot nicer, but it is definitely not printer friendly.


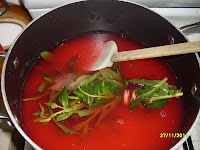
After cooking the Rhubarb and beginning to strain overnight.


I was too tired to cook this when it was ready, so I put it in the fridge until the following day.
Then it was time to get cooking.
 

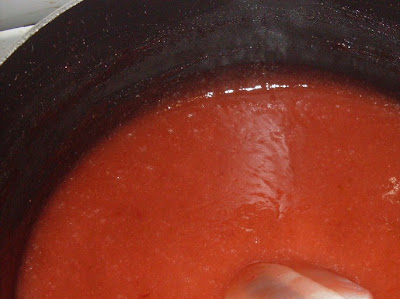
My Nan and my Mum have always added a blob of butter to settle the scum that forms on the top of a rolling boil jam. This was beginning to make a scum, so I added the blob of  butter.....
 
Going from memory, I thought the butter would dissolve the scum, but it didn't. It did however make it nice and thick and contained in one area, so it was easier to scoop off the top.
I'm sure I have used this method and had the scum disappear before my eyes.....Hmmmmm
Here is the scum that I scooped....but I only took the photo after I had removed the mint, which is at a later step.
Use a latex elastic band to bundle the mint together...
Quicker than tying a string, and re-usable time and time again.


After boiling for what I thought was enough time to be thickening and getting close to setting point..I decided to add about half a cup of lemon juice (from the freezer) to help reach setting point. Lemon juice is high in pectin, which is what is needed sometimes to make a jam or jelly set.
adding the lemon juice

The instructions say to add the chopped mint after removing from the heat...I was weary of this, as I felt that the mint should feel cooked on the palate. So I added the mint once it started to thicken. I'm glad I did, as the fresh mint floated on the top of the jelly in the saucepan. I figured, if it floated in the saucepan, it will float in the jar....Which is not what I wanted.

I'm pleased to say that the jelly soon thickened after adding the lemon juice, I think another 20 minutes did the trick too.
I also cooked the jelly longer to make sure the mint was cooked.....but it still floated....so I decided to wait until it cooled considerably until pouring it into the jars. Having the jelly thicker, I was able to stir the mint through the jelly, and it remained mixed through. (Genius thinking on my behalf..lol)

But now I had another problem.........
The jelly would be too cool to seal the lids....I remembered that Rhonda had posted about canning in the oven with small batches, so I had a read and decided on popping them in the oven for roughly 35 minutes on a medium heat.
This method sealed them nicely once they cooled. It popped those little buttons down as soon as I tried to move them.
Done!
I think I will have to try this jelly on a cold meat like lamb or silverside. It would also be good on toast or a crumpet too. I can taste the rhubarb flavour, then comes the light minty flavour at the end. It's very delicious and very light in flavour, but I'm not sure I will make it again, unless I add the lemon juice from the start of the cooking process to help set the jelly.

4 lovely jars with a delicate flavour of Rhubarb and Mint.
I love how the freckles of mint dance through the colour of the rhubarb.
even after all that fussing, some settlement of the mint on the top still remains....Oh well.


Saturday, November 26, 2011

Rhubarb & Ginger Jam

Yesterday I mentioned that I was making for the first time a Rhubarb & Ginger Jam. Well I have to tell you I was as surprised as Mum when we tasted it. Mum's first reaction was, "Wow, we should have been making that years ago!" So there you go! It is really delicious. The only problem now is that it didn't make enough. Because of the surprisingly delicious flavour of this jam, I am going to be making more for the stockpile.

Rhubarb & Ginger Jam


More Rhubarb recipes to come....Next.....Rhubarb & Mint Jelly................................

Friday, November 25, 2011

On my mind...Rhubarb

Photo doesn't show how thick they were as well as long.

Many thanks to Rhonda at Down to Earth for this concept.

This is a Friday photo feature that anyone with a blog can join. To take part, post a photo on your own blog, write a short caption explaining it, and link it back to here from your blog by saying you're part of "On my mind". Please write a new post, don't link to an older one. When you've done that, come back here and add a comment below, with  a link to your blog. 

This is the largest I have ever seen my Rhubarb. It is definitely a good season for Rhubarb. I have a few ideas as to what I will use it all for, but I will also share some with a few neighbours too.  This Rhubarb is the very same Rhubarb that was planted at my Nan's house....I have since shared the plants with one of my Aunty's as well. It's also beginning to go to seed, which I will save when it is ready. Another way of sharing out my Nan's Rhubarb.

Yesterday I began two different preserves using Rhubarb, both using 1 kg of the fruit. Both recipes are new to me, so follow along and see where it takes us.

You would think that I have made a bit of a bare patch in the Rhubarb bed now, but you would be mistaken....lol There's just soooo much of it out there, which is great, except I don't like it, Mum does! However, I do enjoy the lovely champage it makes. We make it on and off over the summer holidays.
I haven't tried it in any other form for years, so it may be worth tasting again sometime soon.

Rhubarb and Ginger Jam


................so far so good.

keep an eye out for other Rhubarb recipes coming soon.
What is your favourite way to enjoy Rhubarb? Have you ever made jam from it?

Related Posts Plugin for WordPress, Blogger...