WELCOME to my BLOG

Hi there!

I’m slowly working towards some simplicity within the home, but hey! It’s a lot of hard work!

I love having a go at growing my own veges and always use herbs fresh from my garden. I try to plant from seed whenever I can and have learnt to save and share my own seed for the following year. I make Award Winning preserves and pickles; and my husband brews Award Winning boutique beers as well. I love to stockpile and try to limit quick trips to the shops. I dabble in bread making and enjoy making my own stocks too.

I enjoy feeding my family good hearty meals, nothing like those tiny restaurant stacks you have to look for on the plate. My husband maintains our vehicles and machinery and we both enjoy fabricating on a small scale mostly relying on metal & timber recyclers for any materials needed.


While I don’t always have time to reply to comments, I love reading them. I hope you enjoy your stay and I hope you learn something new because I love sharing what I learn, and I'm always looking for another new skill myself.

Cheers!

Tuesday, May 31, 2011

My very own Bucket List

There is something to be said when we set goals for ourselves...To not have any goals, is to wander aimlessly while achieving the bare essentials. When I make lists for the day-to-day; run-of-the-mill stuff, these are mini goals, and easily achievable. (normally)...

A Bucket List requires time, planning, patience and probably a whole lot of money....It is also geared towards a list of things you would like to accomplish before you die.

Here is the beginning of my own Bucket List....Some are reachable, some are slightly dreamy.....and some are still missing, as I am yet to discover that I want to do them.

MY BUCKET LIST

  1. Visit Britain and walk in my fathers’ footsteps.
  2. Swim with dolphins
  3. Raise chickens
  4. Fit into clothes from ANY store
  5. Own a house cow
  6. Travel around Australia being self-sufficient from the land and ocean
  7. Make Cheese
  8. Learn how to spin sheep wool
  9. Learn how to crochet a circle and do edging for washers and jug covers
  10. Scuba Diving in the Great Barrier Reef
  11. Meet as many of my Blogger and forum friends as possible
  12. Have my house de-cluttered and kept clean
  13. Renovate the kitchen to suit my kitchen habits
  14. Live on a larger block of land on the outskirts of town
  15. Gather the nerve to go on the biggest theme park ride
  16. Go skinny dipping with my hubby
  17. Visit my Aunty May and new found family in Western Australia
  18. Spend some time living, learning and working at River Cottage
  19. Work in a shearing shed
  20. Work in a dairy
  21. Become financially independent
  22. Become closer to family members
  23. Hold a family reunion
  24. Become a Grandma
  25. Learn the art of Photography 


Do you have a Bucket List? 
If not, why don’t you make one and put it on your blog?..
If you do, leave a link here, so we can enjoy your reading your list too.
Hope you enjoyed reading my Bucket List, now it's your turn to make one.

Vanilla Extract - DIY

Get your hands on some Vanilla beans and make your own Vanilla Extract....it is far superior to that horrible store bought Vanilla Essence. The aroma as I opened the bottle today tells me it is more than ready to use in the kitchen...I can't wait!
I got my Vanilla beans on eBay (around $10 for 20 beans).

To make your own Vanilla Extract you will need:

30g of Vanilla beans (sliced down the centre to harvest the inner seeds; then chop the beans into 1 inch lengths)..
add this to 1 cup of Vodka

Seal well and shake daily for 1 week or every time you are near the brewing delight.

Here is my home made Vanilla Extract.

started Brewing 26 Jan 2011.


Peppermint Tea & Salad

While out in the garden today in the pouring rain...Picking lovely fresh greens, radishes and spring onions...I thought it would be nice to steep some Peppermint.....I enjoy a Peppermint Tea with a teaspoon of honey to sweeten it slightly.


Tea for two
It gives me great satisfaction to be able to gather food from the garden at this time of year....even though it wasn't good hearty veg....I was able to gather enough greens, radishes and spring onions to make a good base for tonight's salad. And to think....I thought there was nothing in my garden.

I even gather the younger radish stems...
they too taste like radish.
(carrot stems are good for salad too for the same reason)

Tatsoi leaves.....notice I keep the good stem off the half eaten leaves.
The snacked on leaves go to the Bokashi bin...
and I add the stems and healthy leaves to the salad.
I also gathered lots of "pick as you grow" salad leaves of three different varieties, 4 small Kale leaves, some lovely young Sorrel leaves, Italian Parsley, Oregano and Chives.....All this made a lovely salad tossed in a mix of two of my home-made vinegars...(Red Wine Vinegar & Fruit Salad Vinegar)

I am loving using my vinegars as salad dressings....during the summer we go through alot of salad dressing...I don't think I will be buying salad dressing anymore....experimenting with my home made vinegars is proving to be a great learning curve.
I found some huge glass clip lock jars the other day for $3.95...they are much larger than the ones I used for making my citrus cleaner.....so today I have put down three more vinegars...two fruit salad vinegars and one Apple Cider Vinegar....Tomorrow I will add some Mother to each one and take photos.

Op-shopping bargains

In my travels lately I have found a few odds and ends that I couldn't resist....We all enjoy checking out the local op-shops...for sure!....You never know what bargain may be lurking...What item you didn't know you couldn't do without....Here are some I have found recently.......

The large glass lids in the centre.....are Fowlers Vacola lids
for when you open a bottle of preserves...also a plastic one from later on.

My nan had this same cutlery; I couldn't resist....
and at .50cents each, how could I pass up these old pegs.

Above & Below:
These bottles may end up being for vinegar. 


What have you found lately at a second hand store....
If you have blogged about it; leave a link here so we can all have a peek.

Spiced Pumpkin & Pine Nut Pasties

My boys did some shopping for me a while back, and well, lets just say, I won't get them to buy pastry for me again....They were a little rough on my pastry packing it and getting it home...they later confessed that they dropped it twice....anyway...I have been thinking of what to do with the cracked pastry....and got it out of the freezer yesterday to examine the damage and see if it was salvageable...


Yep! it wasn't that bad after all....some had the corners broken off, and some were cracked almost in the centre...Great!...


 They ended up all different sizes, and I even got to use up the odd bits by rolling it out again.....I will let the pictures do the talking now.............
I made 23....but I don't have that many now.


I got the recipe off the back of the pastry...

Monday, May 30, 2011

Upside down Pear & Ginger Dessert

I'd like to say I have been flat out here at my blog, but lately life has just gotten in the way...and before you know it; the day is ending....Night seems to come so quickly now...and we have had an enormous amount of rain in the last two days.....I have so much to tell you...I have been very busy taking photos of things that have been happening....but unfortunately I just haven't had time to write. I was stunned when I came back on to find my visitors had climbed another 2000 hits, and I have some more new followers....VeggieGobbler, AfricanAussie, Linda, Angela, Leonie, Miri & Tammy...(Hi Tammy)..Welcome to my blog!

I have some exciting news...I recently met up with Tammy from the Down to Earth Forum....she also blogged about out visit here. Tammy has a few blogs, she is one very creative lady...it's certainly worth having a look around her blogs....While there time slipped by so easily that we didn't even think to eat...chatting through lunch time....I guess sometimes you just forget to eat when you are in good company.
I took a few books with me, and sitting at the table Tammy browsed through my books and I browsed through hers.

Tammy has a lovely garden, including many fruit trees along with 5 plum trees & a lovely Golden Delicious Apple....which was discovered that day....Until my visit, Tammy had thought it was a crab-apple tree. I convinced her to try one off the ground, as she had left them be.....The apples were slightly stunted but I found a larger one amongst the leaves...and gave it to Tammy.....She actually tasted it...I thought they were lovely...but I think if I had bitten deeper, I would have found they were ridden by fruit-fly.....I didn't have the nerve to Tammy that though...as I knew it was a huge step for her to try something from the ground. (Sorry Tammy, but at least you have a Golden Delicious Apple Tree now, and not a Crab Apple Tree). I'd much rather the Golden Delicious.

Could I tell Tammy that she could collect all the apples from the ground, cut away the bad bits...and press them making apple juice...or even ferment them to make vinegar......?
I wonder if she would gather them...that is if she had time...she is one very busy gal.

While there Tammy had baked this lovely light and fluffy Upside Down Pear & Ginger Dessert....We enjoyed a slice while browsing through the books.......I knew right then, that my family would love this dessert.

You know; when you have had a good hearty meal......
and there is dessert to come, but you just can't fit it in......
You could fit this in!         It's so light and fluffy.

Upon coming home...I think the second day back, I cooked the dessert to the recipe...but now I have cooked it again, using apples and I also cooked a 4 batch....this way the oven is being used to it's fullest, We get to have the dessert again ....and there are 3 more desserts for the freezer...to be enjoyed at a later date.
It can't get much better than this....Sarah Lee eat your heart out...!!.

Here is the recipe for ONE BATCH and a few photos of the 4 batch  I made today....

UPSIDE DOWN PEAR & GINGER DESSERT


For the topping, which is actually the first layer in the pan.
2 tablespoons Brown Sugar
1 tablespoon melted Butter
1 firm, sliced Pear
Set the oven to 160 degrees Celsius...Place the melted butter in a loaf tin, then sprinkle the brown sugar over the butter. Arrange the sliced Pear on top of the sugar mix....arrange in a pattern if you wish.

Now the batter.
150 grams Butter
60 grams Brown Sugar
80 grams of Flour...(I used Plain Wholemeal Four)
1 teaspoon Baking Powder
2 teaspoons ginger (I used the bottled crushed ginger)
1 egg
1/4 cup milk (this wasn't included in the original recipe, but I felt it was needed, and so did Tammy)


Cream the butter and sugar together, then beat in the egg. Add the remaining ingredients, and mix well.
Pour the batter over the sliced Pear and bake for about 30 minutes....
Allow to set in the loaf tin until cool to the touch...(I found a better result when turning the dessert up-side down, if you allow it to cool first). 


You will certainly enjoy this dessert...I told my boys they were in for a treat and that it even trumped my Golden Syrup Dumplings.......they couldn't believe me, but after tasting the new dessert......they agreed.


Thanks again Tammy for a lovely day, and a lovely recipe.


I'm so lucky....we have three more of these in the freezer..
desserts can be part of your stockpile too!

Do you stockpile any desserts in your freezer?

Sunday, May 22, 2011

Coconut Biscuits - like Anzac

Ok, so I have had a very busy day. I hope everyone has had a great weekend, I certainly have. Saturday was a made up of a visit to the markets followed by all the mundane things like housework and folding washing that dried in the sunshine the day before.
Then today, I made plans to bake, and go to a SeedSavers meeting....it was to  be my first meeting and I met the ladies through a stall they held at the markets....we chatted at the stall and they invited me to come along to the meeting..and bring whatever seeds I would like to share.....that will have to be a post of its own, so stay tuned for that one..........

Baking got off to a late start today, because I made a few mixes....another post......then I began making the large mix of these yummy biscuits. Instead of typing out the recipe here, I thought you may like the written form....Unfortunately I cannot remember who gave me this recipe, as I have had it many years....and made it many times too.

Here is the recipe for Coconut Biscuits.....Makes 200


I have made up all the recipe, but only baked enough for now......the rest I have placed onto a tray, pressed with a fork then froze them, for baking another day.

After my boys noses lead them to the kitchen, then everyone tasting the biscuits...including hubby....this is what I baked and also the ones I will freeze...I don't think it would have been 200 but it may be close.


They are so yummy....and I get to bake them again, without making up the recipe again. 


Although I am not sure I should defrost them or if I can put them in the oven frozen yet, I will need to experiment as I have never done it before....but if it works, it will certainly be worth it.


Come back later so you can read all about my SeedSaver meeting, and the mixes I made earlier.

Thursday, May 19, 2011

First Aid Kit - The simple version

I sometimes double up with a post, if I think it is important....adding it here and also at the Down to Earth forum....so for those that read both, I apologise ahead of time.


I also want to take time to welcome the newbies to my blog.....I am humbled at the huge response I have been getting with the things I write about. I have now had over 10,500 visitors to my blog, and I only started it in February this year...Wow, that's a big deal for me. 


I have no writing skills, I usually just write the way I speak. I barely do any research before writing, and I'm not always sure that's best....I love how detailed Rhonda's posts are on her blog...she is a very talented lady, with excellent writing and researching skills. She gives you all the information you need to know on a subject. After reading her blog, you come away feeling confident in your new found knowledge and ready to take on the world.


I added this post on the forum as I think it will benefit others...and I will enjoy watching it grow with everyone else's ideas and remedies....


I hope to get the same or similar response here too. So if you like what you read today, please leave a comment, even better, add a few of your simple remedies. I would love to hear from you!


***************************************************************

Do you have a simple First Aid Kit based on home remedies?


***************************************************************


Here you will find a selection of things to keep in an airtight container, this is excellent for travelling or while on holidays or even at home. For travelling or holidays, it doesn’t take up much room and if needed, it’s cheaper to have on hand than a visit to the shops or chemist.

I have only included an example with each remedy. You may have your own to add. 
With this small amount of remedies in your First Aid Kit you will be able to treat almost anything that comes along.

SIMPLE FIRST AID KIT ENGREDIENTS

  • Apple Cider Vinegar
  • Bach Rescue Remedy
  • Cloth  (When the skin is broken, I like to apply a salve of Vaseline and an antiseptic like Lavender Oil, then cover with small square of clean cloth, applied to the skin with Micropore tape. Any sized wound can be dressed this way.)
  • Clove Oil
  • Cornflour – Cornstarch Powder
  • Cotton Buds and Balls
  • Eye Bath
  • Fresh Parsley
  • Garlic cloves
  • Honey
  • Hot Water
  • Lavender Oil
  • Onion
  • Panadol
  • Parsley
  • Small Scissors
  • Micropore Tape
  • Tea-Tree Oil
  • Thermometer
  • Tweezers
  • Vanilla Extract
  • Vaseline


AILMENTS AND REMEDIES

Bee Stings – Apply honey after removing the stinger to calm the sting. Follow with diluted Lavender and Water as an antiseptic.
Cuts & Abrasions – Dilute a few drops of Lavender or Tea-Tree Oil in water to clean cuts.
Ear Ache – Grate an onion, collect the juice and place a few drops in the ear; the volatile oils in the juice is excellent for an earache.
Headache – Dab a drop of Lavender Oil on both temples and the back of your neck; follow up with bed rest for half an hour or more.
Insect Bites – Rub a cut onion on the bite. The itch should stop immediately. Make a fresh cut each time you apply.
Nappy rash – Dilute a spoonful of honey in the bathing water...this will be soothing and provide an antiseptic; followed by drying carefully and sprinkling cornflour on the affected area.
Or a Cotton bud with a few drops of Clove Oil placed on the tooth that is hurting. One of the properties in Clove is Eugenol, which is an anaesthetic used by dentists.
Or crush a fresh clove of garlic and press it on the tooth; Garlic juice contains arsenic, which is a natural anaesthetic which acts immediately. This should numb the pain within minutes.
Pain & Fever – Simple remedies followed by a recommended dose of Panadol.
Poisonous Ocean Critter bites or stings – Place the bitten area in the hottest water you can stand, and then seek medical advice. This will give you some comfort while getting to medical help. I was advised this from the Poisons Information Centre when I was stung by a Fortescue fish.
Sleep – Cotton ball with a few drops of Lavender under your pillowslip.
Sore Throat – Suck on a spoonful of honey to relieve a sore throat.
Stomach Upset – Add a few drops of vanilla extract and some honey to a warm drink with help an upset tummy.
Or drink a tablespoon of Apple Cider Vinegar. This will ward off any underlying bugs making you feel uncomfortable. This is excellent for a full blown stomach bug. It is easier to drink in a small amount of Orange Juice or Orange Cordial.
Stressful situations – Four drops under the tongue of Bach Rescue Remedy 4 times a day - Rescue Remedy is a blend of homeopathic preparations of flower essences that has had a long history of providing relief to people who’ve experienced emotional or physical shock. It’s now available in most health food stores and is invaluable to ease the trauma out of an experience such as a dog bite or car accident or loss of a pet.
Stuffy Head Cold – Place a Cotton ball with a few drops of Tea Tree Oil under your pillowslip.
Sweating – Dry carefully and apply cornflour (cornstarch powder)
Sunburn – Dab 100% Apple Cider Vinegar on your sunburn, you will soon feel relief....
You could also apply cold black tea instead, as Tea is easily available.
Teething Pain – Rubbing a little Vanilla Extract on a baby’s gum feels warm and calming, but also relieves pain from teething.
Toothache – Crush a couple of fresh parsley leaves with a little bit of salt, and then put the mixture on the aching tooth.
Or crush a fresh clove of garlic and press it on the tooth; Garlic juice contains small doses of arsenic, which is a natural anaesthetic which acts immediately. This should numb the pain within minutes.
Or a Cotton bud with a few drops of Clove Oil placed on the tooth that is hurting. One of the properties in Clove is Eugenol, which is an anaesthetic used by dentists.


***************************************************************

If you are planning to make up this kit, it is also a good idea to copy and print off the list of ailments with remedies, that way you can recall what each remedy is for.

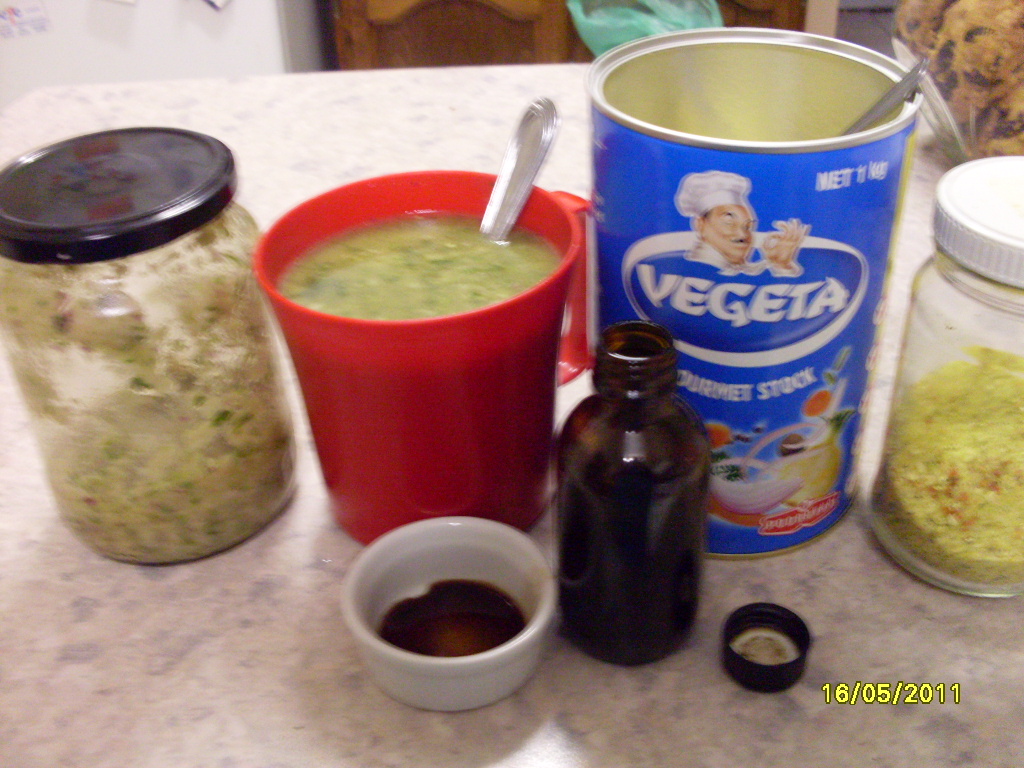
Oh, I forgot to add garlic, parsley and an onion to the photo, sorry!


 I like to keep it simple with common remedies that are obtained easily.
Do you know of any other ailments that can be treated with this Simple First Aid Kit?
Maybe you have your own kit that you could share with us?

Tuesday, May 17, 2011

Rhubarb Champagne - Part Two

Well I said I would take photos next time I make the Rhubarb Champagne..(updated added link)..we drink it before it becomes alcoholic though...so you could call it Rhubarb Fizzy.

I made it yesterday, bottled it today, and will taste it tomorrow, if it is fizzy and sweet, I will refridgerate it tomorrow, if not, I will wait another half day at a time....tasting it each time.....I don't want a dry drink...so it has to go in the fridge before it turns dry.


Update: Now the recipe is also included here too:


Recipe - Rhubarb champagne

2lb rhubarb
1 sliced lemon
8 pints of cold water
1 lb sugar
1 dessert spoon of vinegar

bottles 
nylon curtain to strain it.

Wash rhubarb and cut up roughly, add sugar, finely sliced lemon, vinegar & water...Let stand for 24 hours, stirring occasionally to dissolve the sugar.

Strain through nylon curtain. Bottle and seal tightly. Screw-top coke bottles are good because they allow for expansion from gas...

The champagne is ready to drink in a few days, but becomes alcoholic after 2 weeks....The drink is very sweet the first few days, this is when my kids drink it as it is not alcoholic yet.

I prefer it sweet, and we generally drink it chilled. After bottling, I taste it every day until I get the flavour I like, then pop it in the fridge to stop fermentation. All of it must go in the fridge if you like a sweet wine.....

Over time the sugar is converted to alcohol with fermentation. The longer the fermentation the dryer the 'wine' due to less sugar.......

For a sweet wine, once it reaches the desired flavour, store all of it in the fridge to stop fermentation.
For a dry wine, store at room temperature in a cool place to allow a longer fermentation . Once again, when it reaches the desired flavour place it in the fridge. Bottles will expand greatly with this method, hence the plastic coke bottles.....

Remember if wanting a dry wine, the bottles can warp and explode....The gas needs to be released once in a while....

you will be amazed at the lovely pink coloured drink you get.... 


Do you think you will try making it? Will you want it to be a dry or a sweet drink?

Drying Roses

Mum gave me her Birthday roses (which she got from my DS19) today to discard...little does she know I have kept them and will be drying them out to make her some Pot Pourri..

The art of keeping the colour in a dried rose petal is to not disturb them while they are drying. I used to shuffle them to rotate them while drying, till one time I forgot I had them and left them.....went back and found the colour was so much better.

Gently pull the roses apart, separating all the petals, and clipping the rose head....the rose heads and smaller leaves are good to add to your pot pourri for bulk.....

Leave them all to dry in a draft free area....check in on them from time to time...once they are all dried and crispy, store in an air-tight container....
I will add some dried pot pourri to some organza bags for her for her draws, she likes smelly things in her draws.


This way she gets to keep the flowers her grandson gave her for her birthday for many years to come.

Oh and the scraps...they go into the Bokashi bin of course....or the compost bin.


I have done this with many gifted flowers, I still have some of my nan's rose petals, but the jar is getting very low...I have started adding my own dried Lemon Verbena to her dried roses to make them go further...and the gift bags are getting alot smaller.

Garlic & Mushroom Broth using my Soup Starter

I have a new addition to my stockpile.....A soup starter...which I keep in the fridge.
It is so handy and simple to make.....

In a blender or whizzer, finely mince up the following:
1 big bunch of spring onions
a couple of Spanish onions if you have some on hand.
a good cup of minced garlic..I just used the bottled variety (home-brand too)
adding Olive Oil while it is whizzing to make a good spooning consistency.
Store in an airtight jar in the fridge.

It really couldn't be any easier....The black lidded jar in the left of the photo was full a week ago.....I have been using it all week in a myriad of ways. It is a fantastic starter to a number of dishes.

Now back to that Garlic & Mushroom Broth 
to warm you up on a cold winters day.

To my big red soup cup(550 mls)...I add the following:

2 tablespoons of the soup starter which I explained above
1 tspn of Vegeta (chicken stock powder)
3 teaspoons of Mushroom Ketchup

Now fill the cup with boiling water, and enjoy...It will help keep any cold or flu at bay, and it will certainly get you warmed up after being out in the cold.
Left to Right: Soup Starter, My soup, Mushroom Ketchup & Vegeta.
So sorry the photo is blurry, I missed that.
Thank-you Shona for the great idea for the soup starter. I just couldn't wait until I got home to make it.

Monday, May 16, 2011

Dish Cloth swap for Mum

If  you have been reading my blog, you will know that I have recently been involved in a Dish-cloth Swap...I received a lovely set of dishcloths from Becci....thanks once again Becci for the lovely swap.
I also included my mum (who lives with us) in the swap too...She ended up with two swap partners, which is very exciting....

Mum has received her first swap in the mail on Friday....and I am ashamed to say that hers has not reached the post office yet....I have just been really busy....Sorry

Here is the lovely swap mum received from ellimay (Lisa)....
Thank-you so much Lisa, how lovely they are.
I would love that soap recipe.
 Once Lisa receives her swap in the mail...I will post a photo of it, like I did with my swap.
So come back soon and check out what Lisa received as her swap from Mum.

*****************************************
Using recycled cottons for my dishcloths
Here are the cotton rolls I have used up so far.....
I sent these off to Victoria with me
to give my niece for her youngest for Kinder....
I love that I am able to use up all Mum's leftover cottons.
I have also been looking in the op-shops for cottons lately.
Here is what I have reclaimed from op-shops so far....a stash I have  found so far....

You won't find any 100% cotton near the wool in your op-shop,
but you may find some in the craft area.
100% cotton, Aida cloth, Frames & Timber knitting needles
Some balls have been very cheaply priced, as the larger green ball $1...and the smaller dark green ball behind it $.35cents. Sometimes I have found a bag with a few balls in it for as little as $1.50

I hope I have inspired you to use up all your leftover cottons, or maybe next time your in the op-shop, you will look for some cottons that need to be claimed and up-cycled into a lovely dishcloth.

In the garden today

The weather is getting colder, and I have been putting off some work in the garden. Today I finally got around to doing what has needed to be done for a few weeks now.

On a recent visit to Bundanoon I was gifted some seeds...they are out of date, but I planted extra to allow for that. Thanks Maree for the seeds.


It's a bit of a reach over the dog fences, and with aches from the cold weather;
I was a bit sloppy with planting the Peas, but they are out of date, so extra won't hurt.
Using a tomato steak to make the planting line and cover seeds helps to eliminate bending.

Gifted Radish Seed Tape....I have never used seed tape before.

Red Spring Onions.....make a deep line for planting.
Place each seedling in separately, then gently fill in with extra soil.
The seedlings will soon stand up and be happy
once over the shock of being transplanted.
********************************************
 Spuds, Spuds and more spuds......

I bought some Kipfler potatoes a few months back, 
and kept the larger ones aside for seed.
Storing them in a brown paper bag is good, 
as they don't like the light.
See the one that is cut in half.
If you have a seed potato with two eyes spaced apart from each other,
you can cut the seed in half and get two plants from the one seed.

Tub #1: A large pot

Tub #2: A 20 Litre bucket with a hole cut in the bottom....
last used for an hanging upside
down  tomato plant which wasn't so successful.
The tomato plant used all its energy to turn
the right way up, and didn't produce much fruit.

Tub #3: A Potato Bag, gifted to me by Mum.
 I have added about 20cm of soil to each tub, planted the seed potatoes and covered them with another layer of soil. Once the leaves start to show through the soil, I will add another layer of soil, thus producing another layer of potatoes. I have never planted potatoes before.

I must be doing something right, I have been finding a lot of lovely
fat worms in my composted soil.
Last time I was in the garden I was finding them even bigger than this one.
I am wearing gloves because I have some bad cuts
on my hands that I am trying to protect.
 ********************************************
 Mice and Rats hate the smell of baked egg shells.
I sometimes have trouble with rats eating my young seedlings, 
I have since been told that they can't stand the smell of baked egg shells,
so they got sprinkled where I planted radishes and a few rows of Carrots and Peas today.

Newly planted Radishes from seed tape.....
behind is some almost ready to pick.

Newly planted Peas along the fence
and Carrots up the end.

Making room in your recycle bin

Every fortnight, hubby makes a batch of beer...this uses two large cans of beer starter....these cans have been very useful over time, using them for utensils, storing food and even as baking tins for my Steamed Date and Nut Rolls....Lately hubby has been selecting brands that the can is lined. I have since learnt that the lined cans are probably not the best of choices; so these are being put in the recycle bin. 

After washing the cans (this is all my cans) I almost remove the base of the can with a can opener, fold it inside the can and also add the removed lid, then squish the can....this way the base and lid is stuck to the inside of the can....

I used to insert smaller cans into larger cans, but this idea is even better.


I've been extra busy today, putting down a batch of Rhubarb Champagne and also lots out in the garden....but you will have to wait a few days for my post on the Rhubarb Champagne...so come back, check in and have a go. It's a lovely fresh fizzy drink to serve friends and family when they come visiting.

Dehydrated Apple

I use dehydrated apple as a snack, and this time my DS19 reminded me that we had run out....I still had some of the huge apples in store, so dehydrated apple was another thing on the list for the weekend just passed.

Before drying; I dunk the sliced apple in Pineapple Juice
This stops it oxidising (going brown).

Half of the small jar is already gone in the Rock Cakes I made.
Do you own a dehydrator? If not, would you consider buying one? What would you like to dry in it?
Related Posts Plugin for WordPress, Blogger...