Hi Geoff, Hi Debbie, welcome to both of you....
Feel free to look around, and I would love some feedback......
***********************************
Wrapping the Camembert.
***********************************
I checked out the Camembert, and yep, It was ready to wrap...I first wrapped it in a grease proof like paper, and then wrapped it in foil....Back into the cheese-cave with both, for just a few weeks...as hubby prefers it really young...He says "If you leave it too long, it just tastes like dirt." Well, I kind of agree with him, after tasting the last one while it was young....it was really really nice....I guess that's another plus for making your own cheese, you can stop the maturation, when the cheese is the taste you want.
***********************************
Finishing off the
fat rendering
from yesterday.
***********************************
I also finished off the fat rendering, but I still have to pack it away in the freezer..
This morning, the fat had set in the larger pan....
I scooped out the clean fat into a smaller pan and was left with a layer of dirty fat and water....
This I strained and poured into a small pan.
All the leftover waste goes into a bread bag,
and into the freezer until rubbish night.
Once I had just clean fat, I rendered it some more, adding water again...
I let this reduce to get rid of most of the added water.
Then poured the oil into the containers as shown.
I poured it out while each container was on the scales...
that way each lump of fat will be easier to calculate when weighing it for soap.
Once frozen, I will remove the containers and store each blob of fat
in a freezer bag. That way I get all my containers back too.
I found I only needed 1 jug of boiling water to clean up the yucky oily greasy pot.
If you need to clean a pot like this..
Pour 1 kettle of boiling water around the inside walls of the pot.
Place the lid on and leave to melt down the greasy mess.
Then pour the now warm water over a sieve.
This will catch any bits left behind from the original fat.
Once empty, I rubbed the whole pot with baking soda...and used a soapy dishcloth to wipe it down.
rinse well, and dry with a tea-towel.
Too easy!!!!
***********************************
Preserving Lemons -
another ingredient
to add to your stockpile.
***********************************
While browsing through some of my old recipes...
I found a recipe for Preserved Lemons.
I haven't used these in cooking since I was in a unit in Wangaratta.
Wow, that was way to many years ago to mention...lol.
So I decided to preserve some lemons myself.
When lemons are in abundance like they are now (in the shops anyway)
it's a good idea to stock up and add them to your stockpile by preserving them.
Especially if you have a lemon tree.
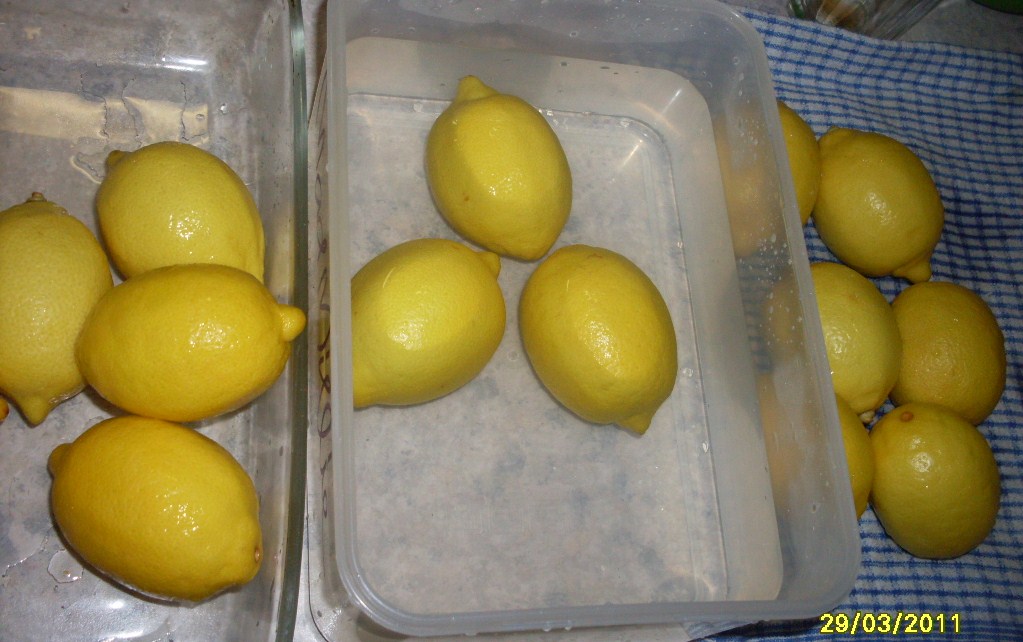
I picked these up for $2 a kilo, while just a few weeks ago, they were $8 per kilo.
Select a glass jar with a secure lid...
preferably not a steel lid, as the heavy salt may react with it.
Wash your lemons well, I used warm soapy water.
My soap that I make.
You can see the brush in the water,
I rubbed the lemons on the brush to remove any blemishes or marks....
Rinse well, in a water bath with half a cup of vinegar.
This will neutralise any soap residue left on the lemons.
 |
| Soapy Rinsed Draining |
Spices used were Bay, Cinnamon, Star Anise, Cloves & Peppercorns.
I found it easier to decant your spices onto a plate,
as your fingers are going to get covered in lemon juice and salt.
This way you are not contaminating your spice jars.
Cut the ends off each lemon, and cut into quarters,
but don't cut all the way through the other end.
Fill each lemon with salt,
I just used cooking salt, it's going to dissolve anyway.
Pack the jar tightly, and add spices as you go.
Fill smaller gaps with quarters. Add salt and spices as you go.
Here is a photo of the jars of lemons, just before I filled them with lemon juice
You can see that the salt is already drawing the juice out of the lemons...
Me being the frugal one...I also made a smaller jar using all the cut ends...
I LOVE NO WASTE!!!
When using preserved lemon in a recipe:
Select a piece of lemon from the jar
Rinse well with fresh water
Remove the flesh from the rind
Discard the flesh, and use the rind
Cut into fine strips or refer to your recipe.
So why not preserve the ends too...that's the bit you use.
***********************************
On to my fourth dishcloth
***********************************
I am still using up all the smaller leftover cottons from Mum....
she crochet's around face-washers and tea-towels
and has had a few bits left over.
so far my cotton dishcloths have cost nothing.
I am using the one on the left and the centre one.
I have decided to keep on knitting
I may even use them for Christmas gifts.
Mum says she can see my confidence has grown...
she see's me taking my eye off the needles while talking to her....
I didn't even know I was NOT watching all the time.
Hope you all had a great day...
Mine has been a productive and busy one again.
I guess soap is next...seeing I have all this free oil...
I even have the local chip shop saving Cotton Seed Oil for me
I picked up 4 litres off him the other day to make soap.
Thanks Paul.
If you like what you see, or would like to ask a question,
please don't hesitate. Drop me a comment, and I will get back to you.