WELCOME to my BLOG

Hi there!

I’m slowly working towards some simplicity within the home, but hey! It’s a lot of hard work!

I love having a go at growing my own veges and always use herbs fresh from my garden. I try to plant from seed whenever I can and have learnt to save and share my own seed for the following year. I make Award Winning preserves and pickles; and my husband brews Award Winning boutique beers as well. I love to stockpile and try to limit quick trips to the shops. I dabble in bread making and enjoy making my own stocks too.

I enjoy feeding my family good hearty meals, nothing like those tiny restaurant stacks you have to look for on the plate. My husband maintains our vehicles and machinery and we both enjoy fabricating on a small scale mostly relying on metal & timber recyclers for any materials needed.


While I don’t always have time to reply to comments, I love reading them. I hope you enjoy your stay and I hope you learn something new because I love sharing what I learn, and I'm always looking for another new skill myself.

Cheers!

Showing posts with label Recipes. Show all posts

Tuesday, December 18, 2012

Pickled Cucumbers & Pickled Onions

The house still smells of pickles and onions. If hubby doesn't have a training day on Wednesday he will be home for his 3 week holiday tomorrow. He'll smell them when he drives in the driveway for sure. Hubby loves my pickles and usually puts in a request when stocks are low. So this will be a nice surprise for him. I'm making all his favorites so far...come to think of it...All my preserves are his favorites.
***************************
Hint: If you plan to make both recipes at the same time, it makes for one lot of preparation. One mess to clean up too which I like. Weigh out onions for both recipes, keeping them in separate bowls. Prepare 1 double batch of the spiced vinegar mixture and bottle the cucumber mix first. After bottling the cucumber mix, reheat the spiced vinegar.Add the plain onions and repeat the bottling process. Too easy!
***************************
Bread & Butter Pickled Cucumbers


12 medium burp-less cucumbers  
1 ½ lb onions 
tablespoons salt                                
1 ½ lbs sugar
3 tablespoons mustard seeds
½ teaspoon turmeric powder                                 
teaspoons celery seeds
1 ¼ pints white vinegar                   
¼ teaspoon cayenne pepper
I'm trying out a new seedless variety  
In a suitable large vessel put thinly sliced cucumber and onion.  Sprinkle with salt and let stand for 4 hours or overnight. I always leave them overnight 


Pour into colander and rinse and drain well. Rinse and drain again.
Boil together vinegar, spices and sugar. Then add rinsed cucumber and onion and simmer for 2 minutes.  (avoid actual boiling) 

Bread & Butter Pickled Cucumbers
 Pack in sterilized jars, clean rims and any drips and seal immediately.  If any don't seal; pop them in a moderate oven for 15 minutes, then remove from oven and allow to cool. This process should seal all jars. If not, discard the lid once you have finished eating that jar. Enjoy in 3 to 4 days. 

You can order new lids for recycled jars from Green Living Australia by clicking here.(I don't get any credit) They also have a great FAQ page on replacing your lids too, It has loads of information on there.
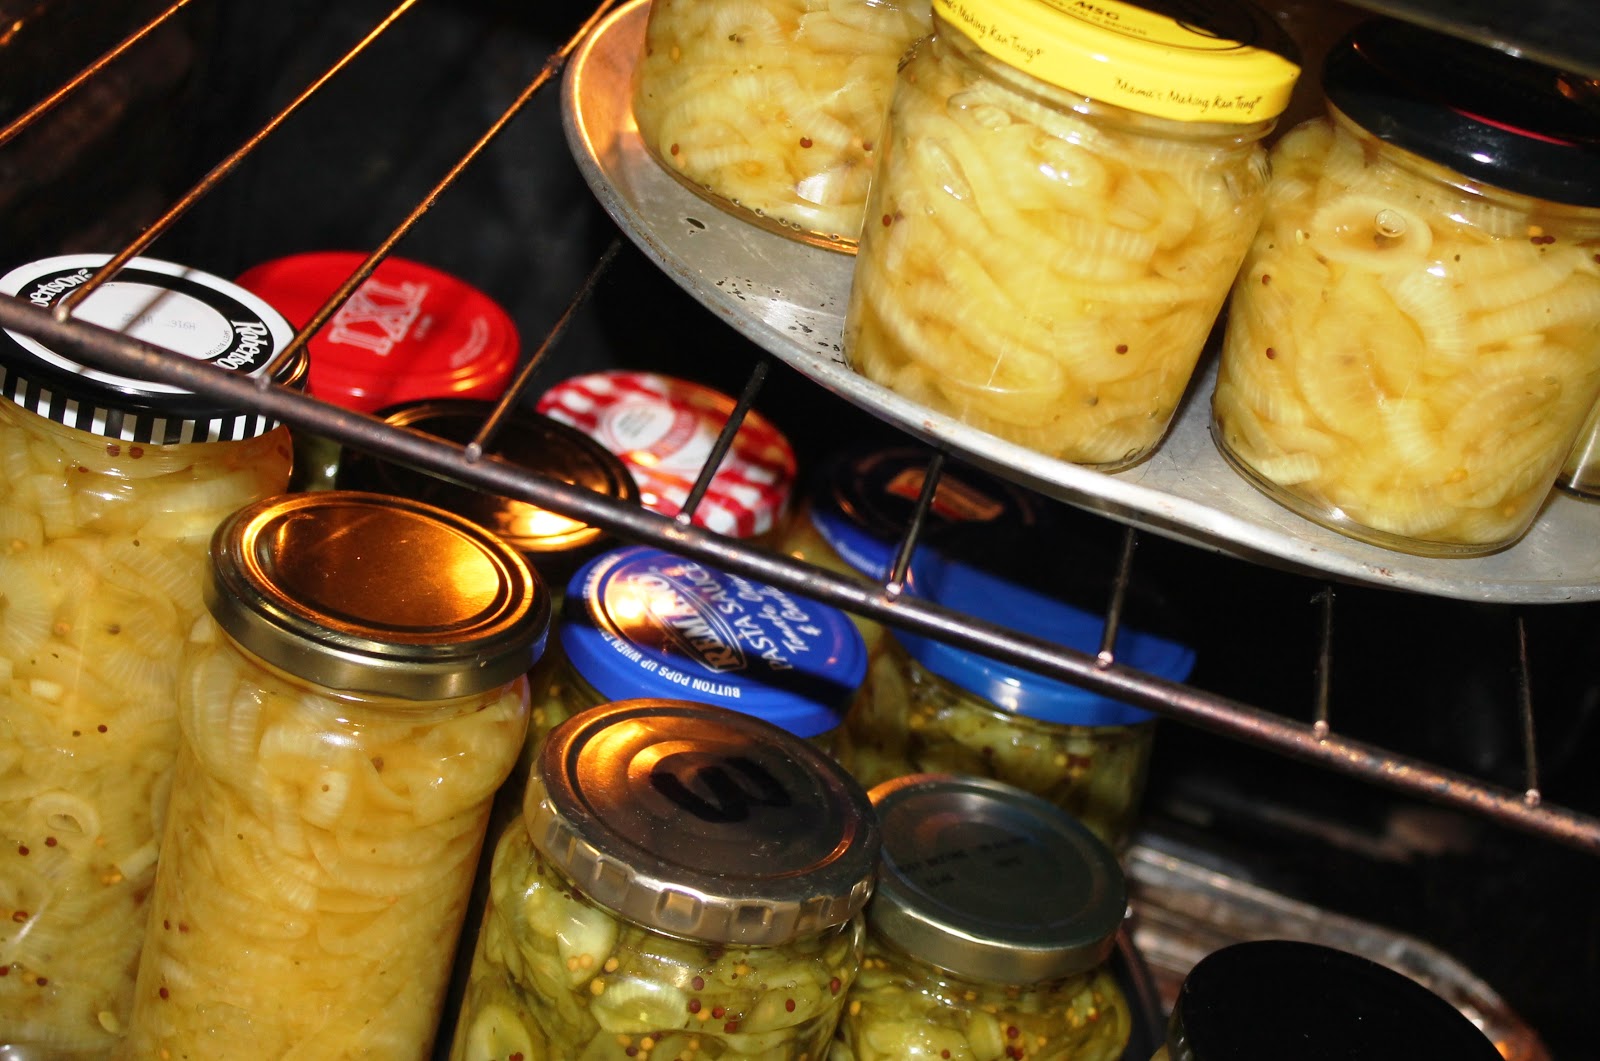
All these jars sealed, except for three. Those lids will be ordered.
***************************
Pickled Onions - For sandwiches (Yep! Pre-sliced pickled onions...Brilliant idea of mine I think!)

4KG ONIONS sliced thin
tablespoons salt                                
1 ½ lbs sugar
3 tablespoons mustard seeds I added extra mustard seeds, 
as most went in the Pickled cucumbers first.
 ½ teaspoon turmeric powder                                
teaspoons celery seeds
1 ¼ pints white vinegar I like to use 50/50 of white vinegar and malt vinegar                   
¼ teaspoon cayenne pepper

Use the same method as the above "Bread & Butter Pickled Cucumber recipe"
Salted overnight

Rinsed twice and added to Spiced Vinegar then bottled.
***************************
Having Hubby home will give us a chance to spend some quality time together. We have lots of plans to go fishing, especially since I've fitted out the boat with a new motor, new forward controls, mounted burly bucket, speedometer,  mounted knife holder, mounted tackle draws, mounted live-well tank and a new drive-on trailer. That's quite a list; but it's been quite a year for hubby too, he's worked so hard this year, he deserves to be spoiled. It was a huge surprise for him to come home from Mudgee (on his birthday) to find it all decked out....He had no idea
We are all looking forward to having him home. Our family of four will be together now for Christmas....Time with family is precious, especially this time of year, especially THIS year.

Monday, May 28, 2012

Milling wheat & making pasta


Yesterday; Celia over at Fig Jam and Lime Cordial posted about her Simple pasta in 15 minute's ......and that got me thinking of another way to thicken up the rest of the weekend soup to make into one more meal.....

Many people mill their own grains at home; and I've been giving it a go too. It's far healthier for you, no additives, no thickeners, no bleaching chemicals....just plain good wholesome wheat! If you have your own grain mill you can mill down a whole number of grains, seeds, nuts and even legumes. You even have full control over how fine you make your flour, depending on what you are planning to do with it.

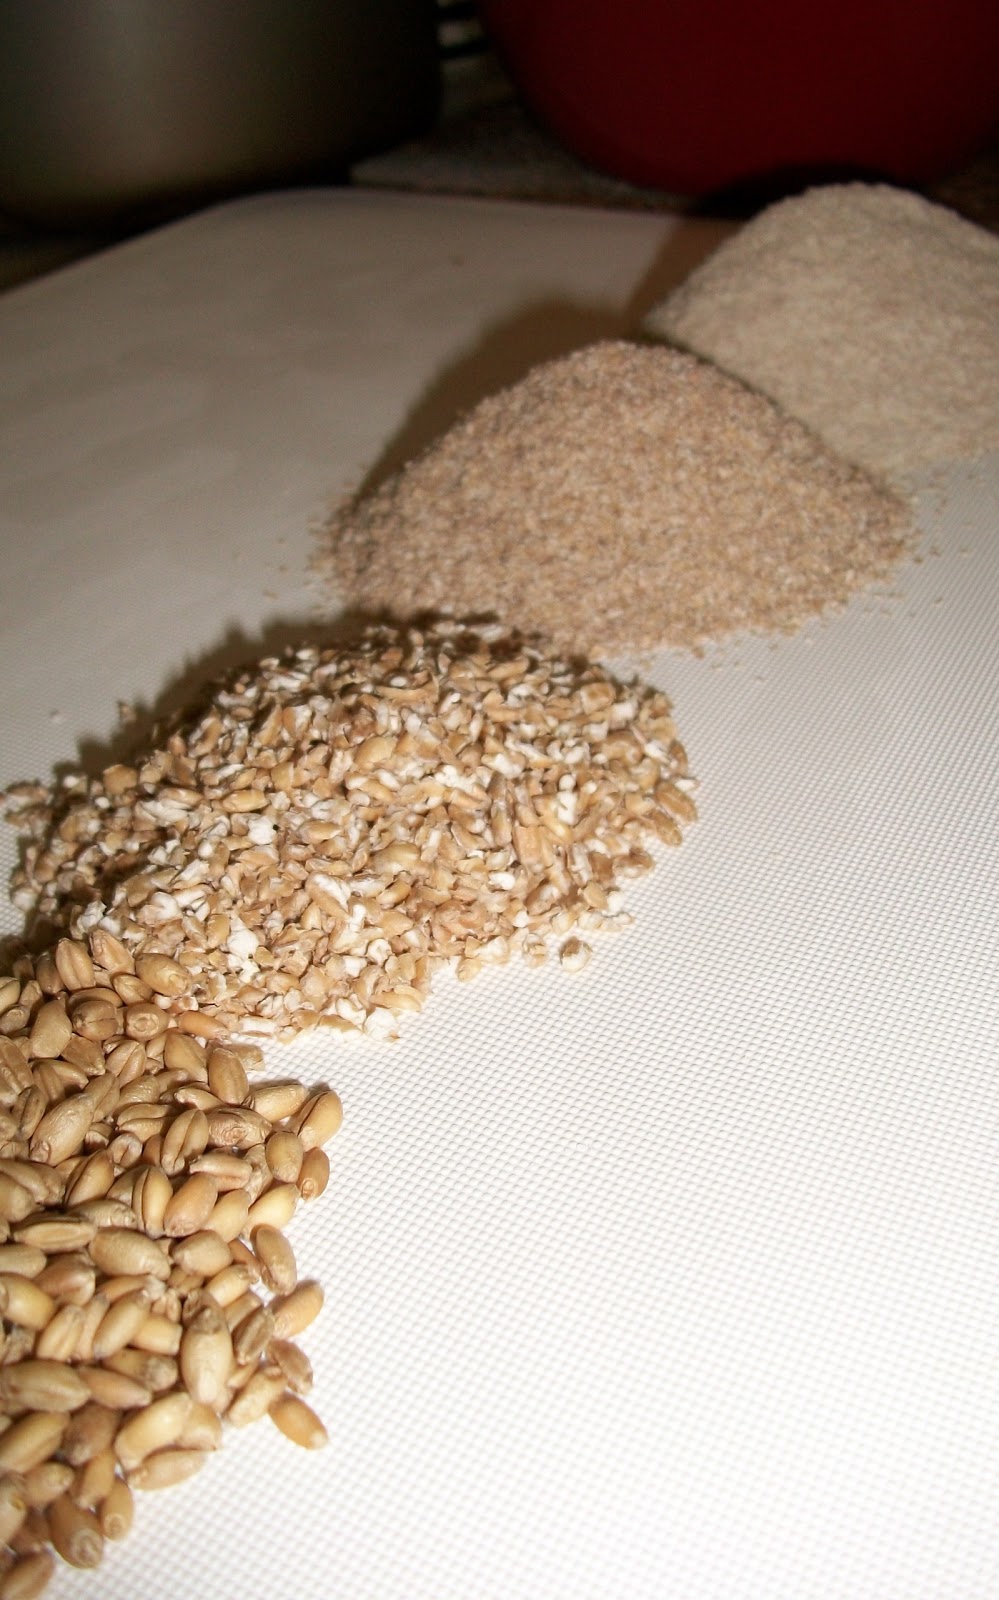
Since sourcing some good bulk grain I've been experimenting more with my electric grain mill. Here are some photos to show you the different stages of milled grain I've been playing with.........

Stage 1: Wheat berries....Whole clean, husked wheat ready for use.

Stage 2: Cracked wheat....I think cracked wheat is prepared by first boiling it...so this is really just crushed wheat. I've been adding some of this to a mix of whole grains when making 'multi-grain bread' and also sprinkling it on the top of bread rolls.

Stage 3: Wheat Bran....This is what you get when you sift the milled flour from its finest setting. Bran is really a by-product of making flour and is made up of the hard shell of the wheat berry. We're sprinkling this on our breakfast and also adding it to other recipes for added fibre.

If I'm making bread, I don't always sift the flour to separate the bran, but when I don't; it makes a very heavy bread....A better or lighter bread is made from 50:50 of whole milled flour and plain white flour. If you don't want to use such refined and bleached flour....just sift your freshly milled flour.

Stage 4: Wholemeal flour.... Here is your flour at it's purest.....
No refining, no bleaching, no additives.
Just Wheat!

********************************

Now I'm ready to make some WHOLEMEAL PASTA......
To every 100g of flour add 1 whole egg.

To 400g of wholemeal flour add 4 whole eggs....and mix well until combined.............


Then divide into four even blocks before putting it in the fridge to rest. I prefer to rest pasta dough for an hour before running it in the pasta machine.

Flatten the divided dough before placing in a plastic bag and pop into the fridge to rest. This shape helps to start preparing the dough for the dough machine.

Only remove one piece of dough from the fridge at a time. This ensures that the other dough pieces don't  dry out while you are working. I used half the dough for dinner ....the other half will keep in the fridge for one or two more days.

Then I heated up the soup that was made earlier..and also put on a pot of water to boil for the pasta....
Due to the cold weekend weather....another pot of soup was on the stove.....
The soup was made up of the following....

  • a smoked ham hock - boiled for an hour, meat removed and added
  • a few roasted chicken carcasses, with meat removed and added
  • chopped meats left to rest in the stock overnight....then fat skimmed off the top before adding other ingredients
  • grated vegetables of carrot, Swedish turnip, parsnip, onion, zucchini
  • mixed legumes and grains (another filler and thickener)
  • thickened with milled rice flour


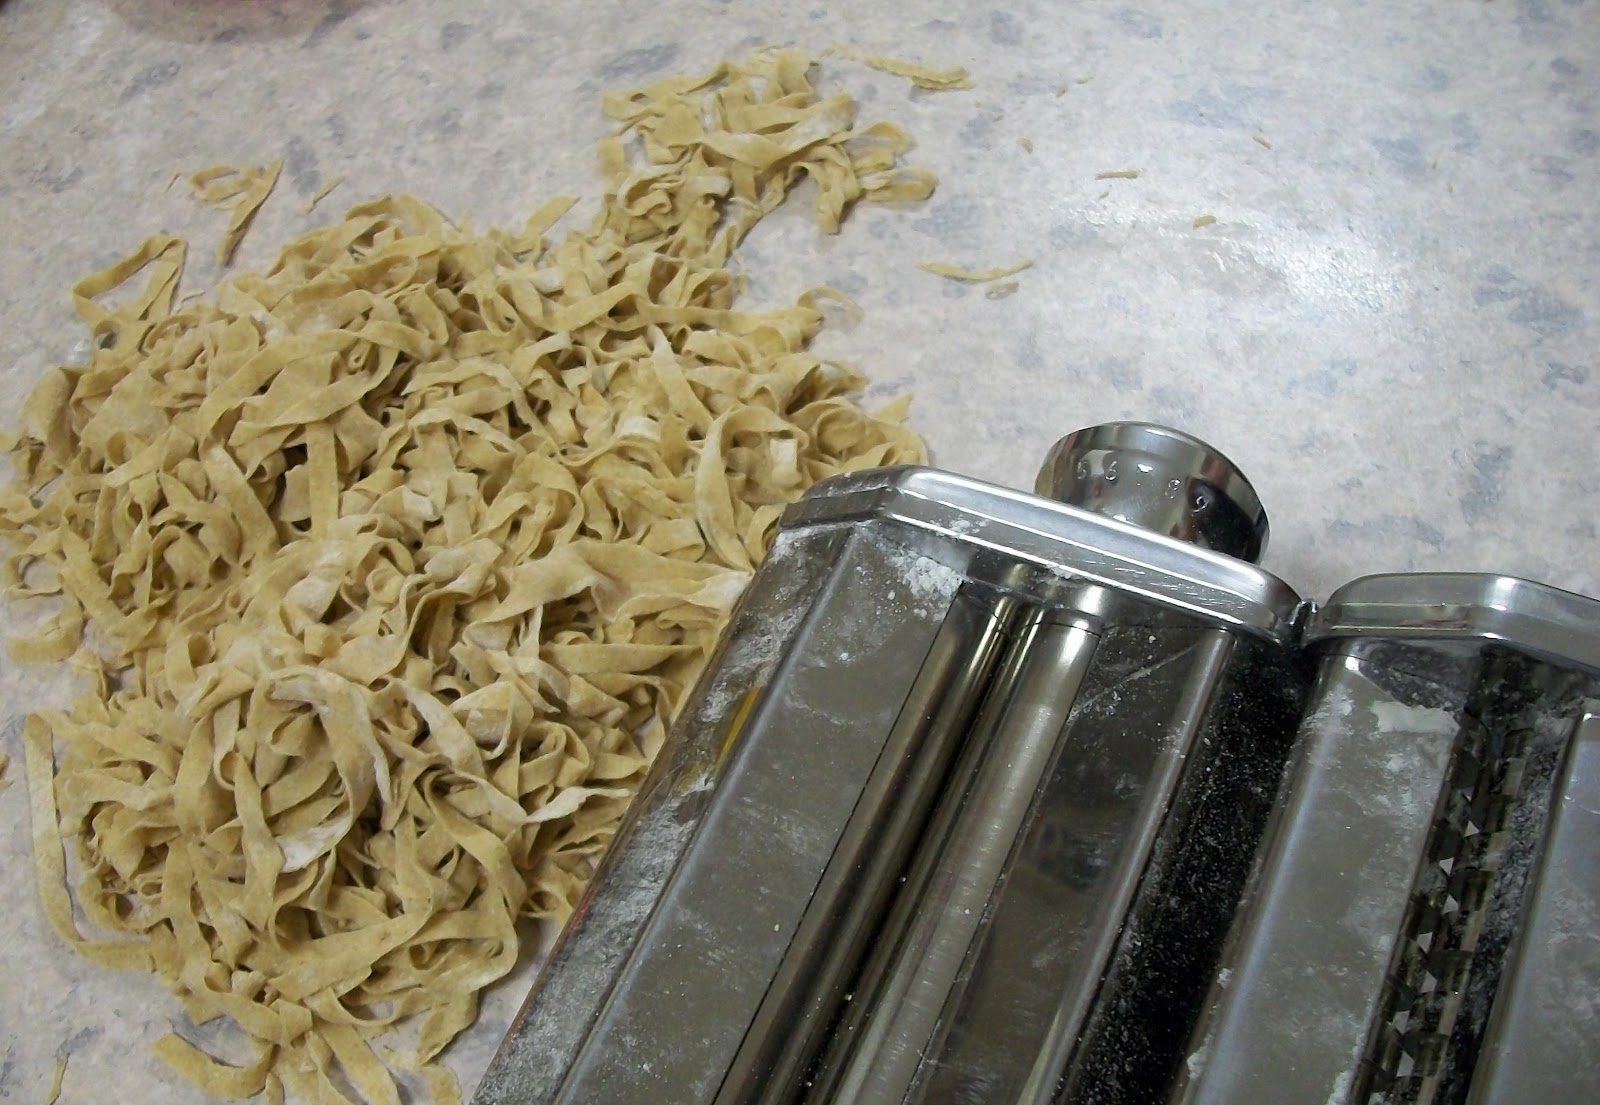
When all the rolled pasta is cut into strips, lightly dust it with flour to stop it from sticking to itself.....

Once the water is boiling, add half of the pasta and let cook for 1 minute...remove the pasta with tongs and toss into the boiling soup....Repeat with the other half of the raw pasta. It's very quick!

then serve.........this soup was very filling, delicious...and quite rewarding; even for DS20 who took great joy in helping make the pasta.....Thanks mate...a job well done.

Do you have a grain mill? What other grains do you like to mill? I'd love to hear your ideas. 

Have you ever made your own pasta? Do you prefer wholemeal pasta or white pasta? How do you make your pasta? What do you add it to? 

Monday, May 21, 2012

Zucchini & Choko Slice


How many knuckles does it take to make a great slice? Three to be exact....well today anyway. With band-aids in place I continued grating until all the veg were done. Who knew a few pieces of skin could make such a delicious slice. Seriously though; there was no skin added, but I've never added choko to a slice before. With only two young zucchini I needed to increase the mixture. Hence another use for a Choko or three.


Zucchini & Choko Slice

8 medium eggs whisked well
add to that 2/3 cup of Olive Oil
then mix in 1 heaped cup of Wholemeal Self Raising Flour
mix well and put aside.

Now in another larger bowl grate the following:
2 zucchini
2 choko
1/2 a carrot
1/2 a sweet potato
1 cup of tasty cheese
then finely chop 1 brown onion & a small bunch of parsley

Mix all this together, then add the egg mixture and stir well.

When you fill your trays, you can fill right to the top, it will rise while baking, but fall when cooling.....
After pouring into two trays,....if your like me you might just have some mixture left over...so if you do...add another egg, a tablespoon or so of flour, and add in another grated choko....then you will not only have two large slices, but enough slice baked for lunch.
Lunch
Grease your trays well, then bake in a moderate oven of 170o C for 20 minutes for the small ones...and an extra 15 to 20 minutes for the larger baking trays. It was a delicious surprise for mum when she returned from Bingo today.
I have enough to serve for dinner tonight, and one for the freezer. Yummmmm!

Have you ever added choko to a slice?

Please forgive the poor quality of the photos today, I guess my camera was having a bad day and maybe I need to refresh my rechargeable batteries. 

Saturday, March 31, 2012

Dog Food home-made

Over at Down to Earth, Rhonda makes her own dog biscuits and dog food....We love giving our Rusty and Cindy treats...(You can view some action photos of the girls here) and what better treat than something that's good enough for US humans to eat. Well....you know what I mean......I have made dog biscuits in the past for my two little dogs, and they love them.....But............

Our Cindy (miniature black & white Jack Russell) just had some major dental work done with 13 teeth being removed...(she already had 9 missing).....I've had to rearrange her diet. With our home-made biscuits being far too crunchy now for her now.

The other day, I bought trays of liver and kidneys....and two trays of cheap minced beef. I had beef and pork bones in the freezer to make some serious stock once home. I forgot to buy chicken carcasses....so it's just beef, lamb and pork for this batch.

Once I had a pot of stock brewing, I got on to chopping up veg in the whizzer to add to the dog food....I was also chopping veg for coleslaw and soup for the community garden...so one mess for three different projects. Brilliant!!

To make the veg fine for the dog food, I put it in the whizzer and added some stock from the stove (in batches)....this makes the veg move around the blades easier and get chopped up nice and fine. I also did this to cut up the kidneys and liver. (Thinking that Cindy won't be doing much chewing, I kept everything fine). Each batch then got put into the big boiler pot, along with the two trays of browned off minced beef.

A good heaped cup of rice, as well as small pasta was also added to the meat and veg mixture.....I then added a few heaped dessert spoons of garlic powder (good for keeping fleas at bay) and more dried herbs..(there was lots of herbs in the stock too)....Covered with the stock I made earlier, it was all left to simmer for a few hours. I also thickened it with some gravy powder.

My cooking was cut short with a huge fall in the kitchen,  catching my toe on a milk-crate I had bought into the kitchen to sit on to get down in those deep corner cupboards.....(bugga! those cupboards, bugga! that milk-crate)......Once I was able to get up off the floor, I got DS17 to turn the stove off, while I hobbled off to lie on the bed and he went and got the ice-packs.....All I could keep thinking was...."Hubby is on his way home for the weekend....and I'm going to spend my time in the hospital having x-rays". The ice immediately paid off...because this morning I woke feeling very sore,  but I really don't think I have broken anything. I certainly done some short term damage with my bad leg, as I feel like I'm walking in a moon boot again.....I definitely hurt an area on my leg where there are screws and a plate....with pain in the same area where I broke my leg last year.....don't worry, I will keep an eye on it. 

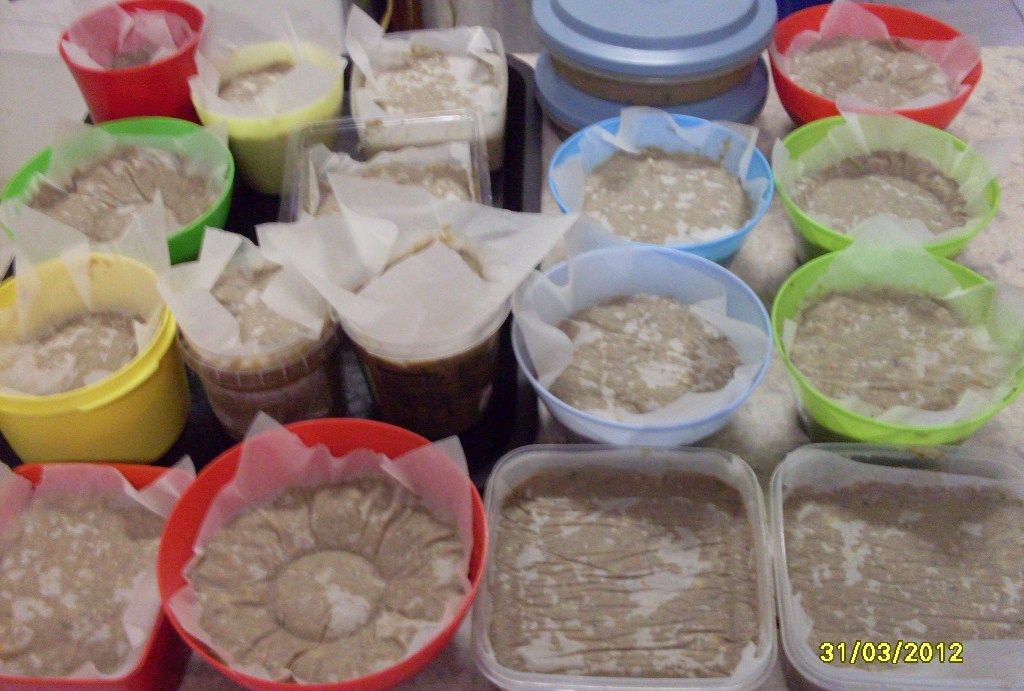
So....the following morning, I found how thick it had turned out....lovely! For my puppy dogs anyway! It actually smells pretty darn good...and the dogs were circling while I was packing it all up for the freezer. I decided 3/4 cup for each dog, but froze it in double batches.
This pot was full to the top.

19 meals for two little dogs.
After dividing it all up...I got 19 days of food for both dogs. Which is fantastic because I don't plan to give it to them every day...supplementing with other foods or leftovers. And they will still have a bowl of mini dry biscuits to graze on each day.

Do you make your puppy dogs their own food? 
What's your favourite recipe? 
If you have blogged about it....leave a link to the post
I'd love to read about it.

Thursday, July 28, 2011

Spaetzle with Kefir Milk

Welcome to all my new followers...I usually have time to individually say hi to you ...but I have mum with a torn tendon behind her knee, which has been keeping me extra busy...I'll be planning a give-away shortly...so look out for that in the near future.....


I've just made some spaetzle for lunch and thought you might like to have the recipe......seeing I don't have a spaetzle maker It took a few experiments to work out what to use...but its all fun here.

I still have plenty of batter to make up more tonight for dinner for the whole family.

Spaetzle...serves as a side dish 6-8 people

3 eggs
1 cup milk (I used kefir milk...and about 1/2 cup extra)
3 cups flour
1/2 teaspoon salt
Beat the eggs until foamy with a wire whisk. Beat in the milk until well combined. Mix together the flour and salt and then stir into the egg mixture a little at t time. The dough should become stiff and elastic.
Bring a big pot of water to a boil. *Using a spaetzle maker, fill the square basket with the dough. Rest the unit over the pot and slide the basket back and forth, watching little bits of dough plop into the water. You’ll know the noodles are done when they rise to the surface, which should take about 2-3 minutes. Remove with a slotted spoon to a bowl. Cover while you finish with the remaining dough.


*I don't have a spaetzle maker...but I found this potato press in the op-shop the other day for $2...and couldn't help but try it on the spaetzle...I had to thin the dough to more like a thick batter....but you could just use a colander to let the batter drip through....


Too thick...the batter wouldn't drop
Too close together, they stuck to each other.

Changed the holes...

A bit too chunky..but it works.

Test: Thinned some batter with more Kefir

The batter runs almost freely.

A much better size.
 After making what I thought would be enough for lunch.....I strained it more...and added some chilled chicken stock (jellied) and some of my kitchen mix that I always keep in the fridge....


I have posted about this mix before here  and here. To make my kitchen mix just blitz a couple of bunches of spring onions, and a few bunches of herbs, what ever you have really...and a jar of good crushed garlic...then blend in Olive Oil to mix..it will set in the fridge as Olive Oil does...but thats ok...it melts back down if you leave it out of the fridge.....I use this to add to a cup of soup...pasta....even on a slab of fish when cooking it...smear in on a steak....the uses are as long as your imagination......but very handy to have....and lasts for ages in the fridge........

Here's our lunch from yesterday...


Here's a side dish for one....I had enough to serve the 5 family members.


It just shows...you don't always need to have the gadget they suggest.....although I could have just used a colander...but I got this potato ricer at the op-shop for $2...and was looking for an excuse to use it...

Mum and I enjoyed our very filling hearty lunch, and hubby didn't believe I had made the pasta...lol...he should pay more attention and not watch so much wrestling...lol.


Although I haven't made spaetzle heaps of times (YET)....I do plan to try different ways of making it...with a stiffer dough...my knife skills aren't that great to cut thin slices off a chopping board into the boiling water (the German method)...and I can't imagine being quick enough to be productive for a family of five.....but I was thinking of almost freezing the dough..then grating it on a grater....I wonder if that would work? Any ideas?

Wednesday, June 29, 2011

Pasta n Sauce - from scratch

My boys love Pasta with a creamy sauce...here is one I made from scratch the other night using up some eggs that were in the fridge.......

First I boiled some pasta spirals...I just buy the cheap brand...while the pasta was boiling, I also needed to boil the eggs...as I would later add the boiled egg to the pasta dish....Now me being me, couldn't see any point in getting another pot out...so I just put the eggs in the same saucepan as the pasta....don't worry; the eggs weren't floating...they're just sitting on the pasta...lol


Here is another simple mix I do...which saves a heap of time in the kitchen....In the whizzer, add 1 jar of chopped garlic, 1 or 2 bunches of spring onions...a handful of basil..this time I also added some parsley and cilatro...also some sorrel and spinach..all picked out of the garden....Remember, anything you add is a time saver....then blitz it all down with Olive Oil....

Place in clean jars and store in the fridge...Olive Oil sets when it is refridgerated, so this will thicken once chilled....but even a teaspoon in a cup of boiling water with a pinch of salt....lovely on a cold winter day....like having your very own cup-a-soups.....

this lot will last me about 2 weeks...I use it in many dishes
even as a spread on salad sandwiches instead of margarine.
Now back to that pasta dish....strain the pasta...keeping aside a bit of the liquor....
Peel the eggs and roughly chop them...although I put them through an egg slicer twice..rotate the sliced egg and repeat....for a diced effect....
Add a huge spoonful of the herb n garlic mix I made above....

Add some grated cheese that I store in the freezer...(so it doesn't go mouldy)

Now pour a cup of the cooking liquor that was kept back...into a jug and add a large spoonful of white sauce mix...and stir until combined.
Add this to your pasta, egg and herb mix....and stir well...cook for another 10 minutes to cook through...If it thickens too much...add some more of the cooking liqour.....and stir well.
Sorry no measurements..as it will depend on how many you are feeding...I used this to serve as a side dish and had enough for two nights.


do you make a similar recipe? I'd love to hear about it....

Sunday, June 19, 2011

Apricot Chicken - Easy

Tonight we had Apricot Chicken for tea, served with rice.....it's such an easy recipe the way I make it...

APRICOT CHICKEN

You will need the following:
2L bottle of Apricot Juice...mine was 25% juice....Cheaper than Apricot Nectar and you get more cooking liquor to soak in the rice
1 pkt French Onion Soup Mix
1.5 kg Chicken Breast OR Chicken pieces....this is the first time I have used Chicken breasts...I left them in a bit long, and found some cubes to be a bit dry
4 or 5 brown onions...sliced or diced

Now on the stove, add the Apricot Juice to a pot...and reduce to half the quantity.
Stir in the packet of French Onion Soup mix
Dice the chicken (if using chicken pieces, I remove the skin)
Dice the onion

Spray a baking dish with cooking spray....
Place onion, chicken and Apricot mix into baking dish
Cook in medium oven for 3/4 hour or until chicken is tender, stirring occasionally to prevent chicken pieces on top from drying out...If you put a lid on to prevent drying, you will create more juice, undoing all that reducing.

Apricot Juice reducing on the stove
and other ingredients...That's it!

Ready for the oven.

Apricot Chicken over steamed rice

Do you like Apricot Chicken? Have you ever made it? If you make it like this, I'd love to hear about it.

Thursday, March 10, 2011

Getting organised & Note Paper

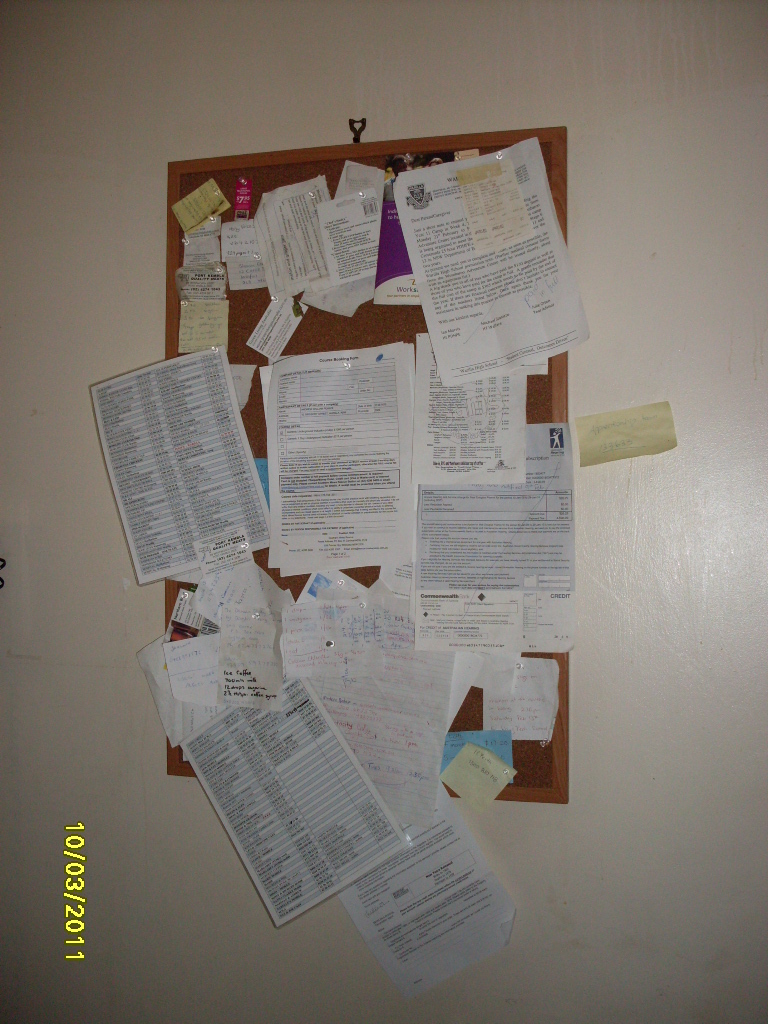
BEFORE

This has been on my mind for some time, it's been gnawing at me every time I use it.....
So; Lets get it organised!
This board is on the kitchen wall, next to the telephone.
What good is a receipt up there for 2 years ago...for bread n milk? 
Or a note for a school camp that's been and gone? 
.....and the list keeps going like that....
I am so glad that I took the time to get this board nice and neat....it is amazing how frustrated one can get when looking through the clutter for something that you know is there....

Now check this out....much better hey? 

AFTER


**************************************************************

WHILE I'M GOING I MAY AS WELL KEEP GOING &
sort out some more papers.....
While sorting out what needs to be filed in the filing cabinet, any papers that can be tossed, have the back checked to see if they are blank. Any with a blank backing, get quartered...and recycled for Note Paper.
I have piles of recycled papers in various areas throughout the house. Next to the phone, is the most obvious place...and I try to keep a check on the pens that are there too. (To make sure they are working). 
Another place to have these is next to the computer, and where I sit. 
The study/library/craftroom also has a pile of Note Paper as well. 

With the amount of papers that come into the house, 
I never need to buy note paper.

Here is the pile I collected today.

I often write quick recipes on these papers, and instead of rewriting them into my small recipe book, I just sticky tape them in....The yellow book gets my day to day recipes....some are cut from magazines, some are printed, and some handwritten. This is the recipe book I take with me when we go visiting family, and the one I take when helping friends with preserving. 
I suggested I give my DS19 a copy of this one when he moves out, and he reckons that he doesn't need it, because if he wants some of 'mum's good cooking', he is just going to come home for tea!
The bottom two folders speak for themselves...and are from everywhere and anywhere. I also have many recipe books in my library, but these folders are for one off recipes or pages.
I thought I had my recipes organised, until I visited Rose the other day...and she has folders like this, but with dividers for soups, baking, dessert etc...Way to go Rose...!!!
I think I will have to get dividers into my larger folders too.
I need to make a folder for my soaps and cleaners too, but for now, they are stored in my Recipes folder.


Are you organised with your recipes?
Tell me what ideas you have come up with.
I would love to hear what works for you.


Sunday, February 13, 2011

PICKLED ONIONS FOR SANDWICHES

PICKLED ONIONS

these are great because they can be used on a sandwhich.


ALSO GREAT FOR THE STOCKPILE, WILL LAST FOR MONTHS.


4KG ONIONS sliced thin
½ tspn tumeric
6 tblspns salt                             2 tspn celery seeds
1 ¼ pints white vinegar              ¼ tspn cayenne pepper
1 ½ lbs sugar

In a suitable vessel put thinly sliced onion.  Sprinkle with salt and let stand for 4 hours.  Pour into colander and rinse and drain well.  Drain again.
Boil together vinegar, seeds, and sugar, tumeric ECT.  Then add onion and simmer for 2 minutes.  Avoid actual boiling, pack in sterilised jars, fill with hot sugar/vinegar liquid and seal immediately.  Enjoy in 3 to 4 days.

No Bake - Banana Slice

For a printable copy with 4 copies on one page go to http://www.docstoc.com/docs/71459083/BANANA-LOG-ROLL

I have no idea why it is called a 'New Zealand' xmas slice.

New Zealand Xmas Slice 

120 grams butter or margarine
1 X 250 gm packet of Marie Biscuits
180 g of banana lollies
½ cup of white choc dots   
½ cup desiccated coconut
½  tin of condensed milk
Extra desiccated coconut to roll in

1.   Smash biscuits to dust but leaving some chunky bits.
2.   Cut banana lollies up (roughly about 4-6 pieces each).
3.   Place biscuit, banana’s, coconut and choc dots in bowl.
4.   Warm the butter through and add the condensed milk
5.   Stir thoroughly to combine the two.
6.   Now add the butter mix to the dry mix and mix well.
7.   Take a piece of grease proof paper and sprinkle some coconut on it to the length of the paper.
8.   Add the mixture to create a long log. (I normally make it into 3 logs to make it more manageable.)
9.   Sprinkle more coconut on top.
10. Squish together to combine and wrap tightly.
11. Roll into a log and refrigerate.
12. Once cold cut into slices and enjoy.

JUMPIN JOHNNIES - homemade yeast free donuts - 1853

Tell the kids they are “Mummy’s special donuts”   


You got to LUV EM, best to make a double batch because they will disappear as you cook them and you will not get any.


Source: First Catch A Kangaroo  - A letter about food written from the Bendigo goldfields in 1853
for a printable copy of the recipe; with 4 copies on one page to share go to 

 http://www.docstoc.com/docs/71459080/HOME-MADE-DONUTS 


3 tblspns sugar
2 eggs
1 cup milk
Grated rind of a lemon
2 ½ cups Self Raising Flour
 icing sugar or cinnamon sugar to roll them in

1 Beat eggs and sugar, add other ingredients and mix well.
2 Heat oil in pan. Test with bread cube.
3 Drop teaspoonfuls of mixture into hot oil.  They will turn themselves. Sometimes they need help!
4 Once brown on both sides, quickly drain on kitchen paper and roll in icing sugar. 
5 Enjoy hot or cold.

Saturday, February 12, 2011

STEAMED DATE N NUT LOAF - bulk recipe for the freezer

Steamed Fruit and Nut Roll or Steamed Xmas Pudding - Bulk Recipe -  Baking     

For step by step photo's...click here
Depending on the time of year and the climate I .......
SERVE SLICED COLD WITH BUTTER OR MARGERINE
SERVE SLICED HOT WITH CREAM, ICECREAM OR CUSTARD

There are no eggs and no butter. An excellent source of fibre so try not to eat the whole thing.

for a printable copy ......... http://www.docstoc.com/docs/document-preview.aspx?doc_id=71459074


I don’t enjoy the traditional fruitcake mainly because of fruit peel and raisin stems but I can choose what goes in these. They are VERY MOIST and VERY POPULAR.

I make these at Xmas and wrap them in glad wrap, freeze them, Tie a ribbon around and hand them out to friends and family to take home and enjoy.

NOTE: My boiler fits 8 tins in it. If I could find a bigger boiler it would make the recipe work well because of the division of one mixture into 3 equal tins. I could use 3 mixtures into 9 cans if my boiler was a bit bigger.

I got my tins from buying cans of pineapple juice and apricot nectar and keeping the tins it comes in. (Apricot chicken was on the menu that night...lol)
(As long as the tins are long and skinny... any should do.) Remember to fully dry them when finished and pack in press seal bags to prevent rust.

My nan used to make these for the red-cross stall, and they were always the first to go, she used to just use mixed fruit.

Its handy to know you always have something on hand for unexpected visitors...they defrost rather quickly....or if a neighbour is having a hectic time for whatever reason, you could always give them one to say your thinking of them..
STEAMED FRUIT LOAF - THE RECIPE
I always triple the recipe. In 3 separate bowls do each recipe. Three batches fill all the tins in the boiler. I have to divide the triple recipe into 8 tins not 9 because of the size of my boiler.

1.         In 3 separate bowls put………..

2 cups all bran (home brand is fine)
Soak in 2 cups milk
2 dessert spoons golden syrup. 
Soak for at least 2 hours or overnight

2.         While the mixture is soaking I then prepare the other ingredients for later use….
Into 3 separate medium freezer bags just to save washing more dishes……..
Add and mix the following into each freezer bag…….
1 cup sugar
2 cups plain flour
2 level tspns bi carb soda
1 tspn mixed spice
2 cups of dried fruit or nuts or both (as long as its 2 cups chopped).
1 tspn ground ginger

I love using apricots, dried apple, dates, cranberries, sultanas, macadamia nuts, walnuts, almonds. I don’t recommend dried banana chips. I also inspect and remove any dried stems left on the sultanas and raisins.

3.         Now take one dry mix and add it to one soaked mix and mix until all is combined.
Spray the tins and the foil lid.
Divide the mixture into the 3 tins (see note)

4.         Repeat step 3 until all 3 mixtures are used and placed in tins.

5.         Cover with double foil and string. I tie string around the top of the tin then across the top to create a handle for removing them from the hot boiler later.

6.         Cook in boiler using enough water to half cover the tins. Cover and boil slowly for 1 ½ hours. When cooked take out of boiler and remove cake from tin, place on another rack to cool. Cut into slices and enjoy.

NOTE - I sometimes make 2 batches in one day so I end up with 16 rolls.

you will make these again.


Related Posts Plugin for WordPress, Blogger...