WELCOME to my BLOG

Hi there!

I’m slowly working towards some simplicity within the home, but hey! It’s a lot of hard work!

I love having a go at growing my own veges and always use herbs fresh from my garden. I try to plant from seed whenever I can and have learnt to save and share my own seed for the following year. I make Award Winning preserves and pickles; and my husband brews Award Winning boutique beers as well. I love to stockpile and try to limit quick trips to the shops. I dabble in bread making and enjoy making my own stocks too.

I enjoy feeding my family good hearty meals, nothing like those tiny restaurant stacks you have to look for on the plate. My husband maintains our vehicles and machinery and we both enjoy fabricating on a small scale mostly relying on metal & timber recyclers for any materials needed.


While I don’t always have time to reply to comments, I love reading them. I hope you enjoy your stay and I hope you learn something new because I love sharing what I learn, and I'm always looking for another new skill myself.

Cheers!

Showing posts with label bread. Show all posts

Monday, May 28, 2012

Milling wheat & making pasta


Yesterday; Celia over at Fig Jam and Lime Cordial posted about her Simple pasta in 15 minute's ......and that got me thinking of another way to thicken up the rest of the weekend soup to make into one more meal.....

Many people mill their own grains at home; and I've been giving it a go too. It's far healthier for you, no additives, no thickeners, no bleaching chemicals....just plain good wholesome wheat! If you have your own grain mill you can mill down a whole number of grains, seeds, nuts and even legumes. You even have full control over how fine you make your flour, depending on what you are planning to do with it.

Since sourcing some good bulk grain I've been experimenting more with my electric grain mill. Here are some photos to show you the different stages of milled grain I've been playing with.........

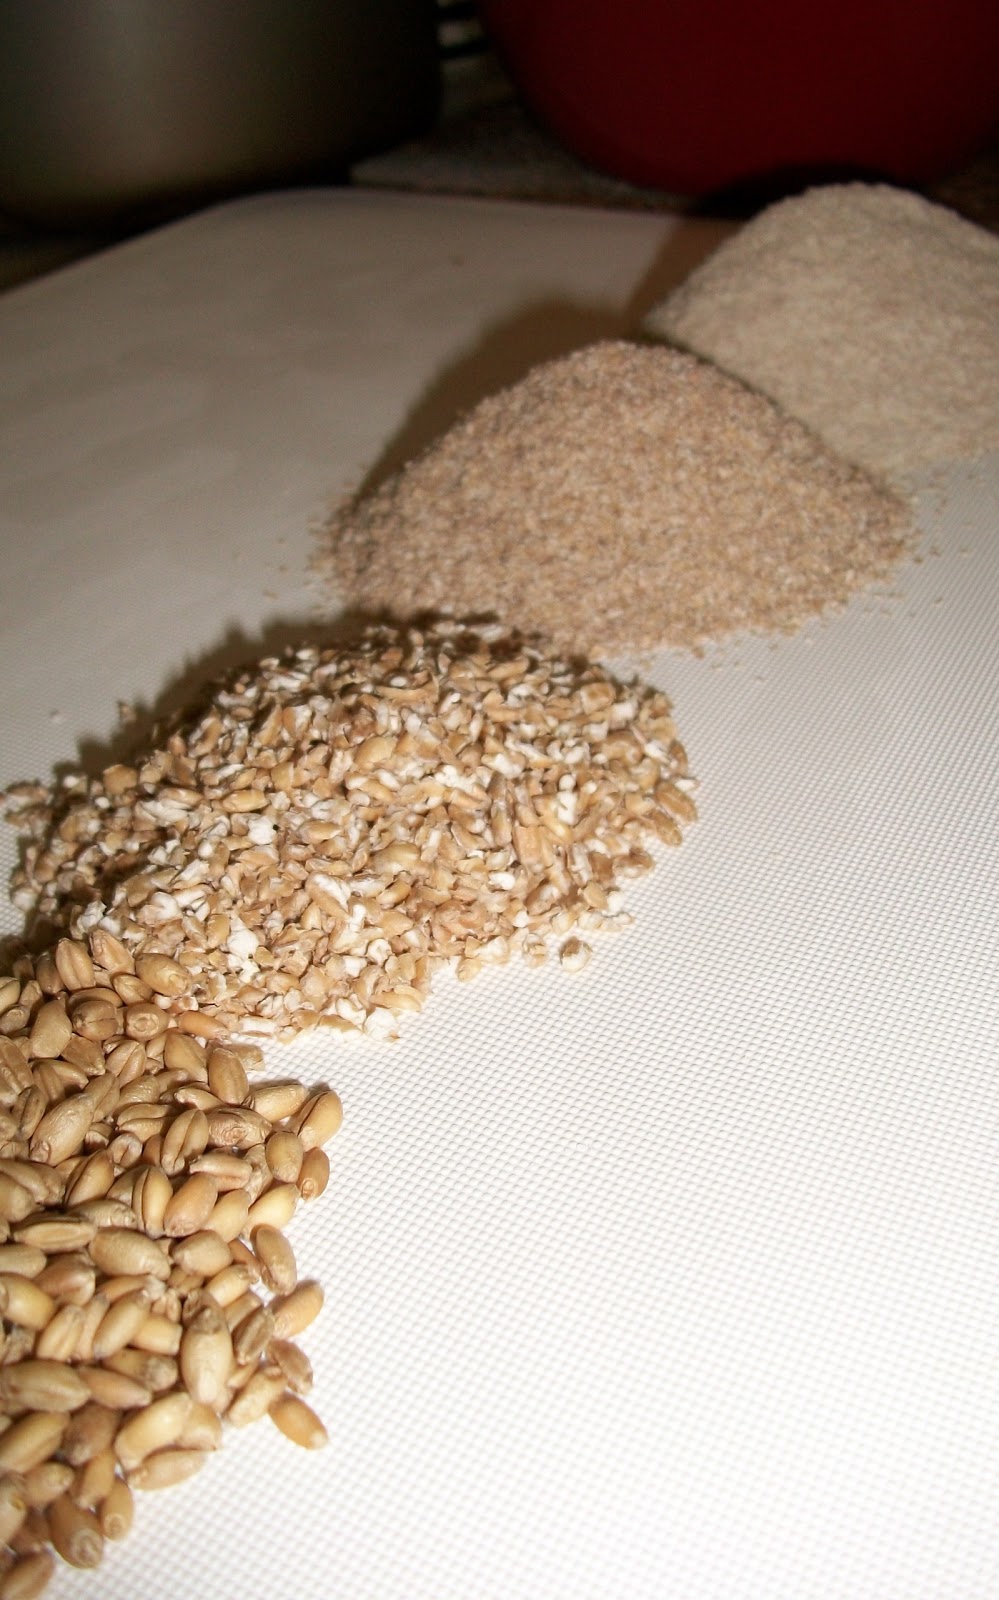
Stage 1: Wheat berries....Whole clean, husked wheat ready for use.

Stage 2: Cracked wheat....I think cracked wheat is prepared by first boiling it...so this is really just crushed wheat. I've been adding some of this to a mix of whole grains when making 'multi-grain bread' and also sprinkling it on the top of bread rolls.

Stage 3: Wheat Bran....This is what you get when you sift the milled flour from its finest setting. Bran is really a by-product of making flour and is made up of the hard shell of the wheat berry. We're sprinkling this on our breakfast and also adding it to other recipes for added fibre.

If I'm making bread, I don't always sift the flour to separate the bran, but when I don't; it makes a very heavy bread....A better or lighter bread is made from 50:50 of whole milled flour and plain white flour. If you don't want to use such refined and bleached flour....just sift your freshly milled flour.

Stage 4: Wholemeal flour.... Here is your flour at it's purest.....
No refining, no bleaching, no additives.
Just Wheat!

********************************

Now I'm ready to make some WHOLEMEAL PASTA......
To every 100g of flour add 1 whole egg.

To 400g of wholemeal flour add 4 whole eggs....and mix well until combined.............


Then divide into four even blocks before putting it in the fridge to rest. I prefer to rest pasta dough for an hour before running it in the pasta machine.

Flatten the divided dough before placing in a plastic bag and pop into the fridge to rest. This shape helps to start preparing the dough for the dough machine.

Only remove one piece of dough from the fridge at a time. This ensures that the other dough pieces don't  dry out while you are working. I used half the dough for dinner ....the other half will keep in the fridge for one or two more days.

Then I heated up the soup that was made earlier..and also put on a pot of water to boil for the pasta....
Due to the cold weekend weather....another pot of soup was on the stove.....
The soup was made up of the following....

  • a smoked ham hock - boiled for an hour, meat removed and added
  • a few roasted chicken carcasses, with meat removed and added
  • chopped meats left to rest in the stock overnight....then fat skimmed off the top before adding other ingredients
  • grated vegetables of carrot, Swedish turnip, parsnip, onion, zucchini
  • mixed legumes and grains (another filler and thickener)
  • thickened with milled rice flour


When all the rolled pasta is cut into strips, lightly dust it with flour to stop it from sticking to itself.....
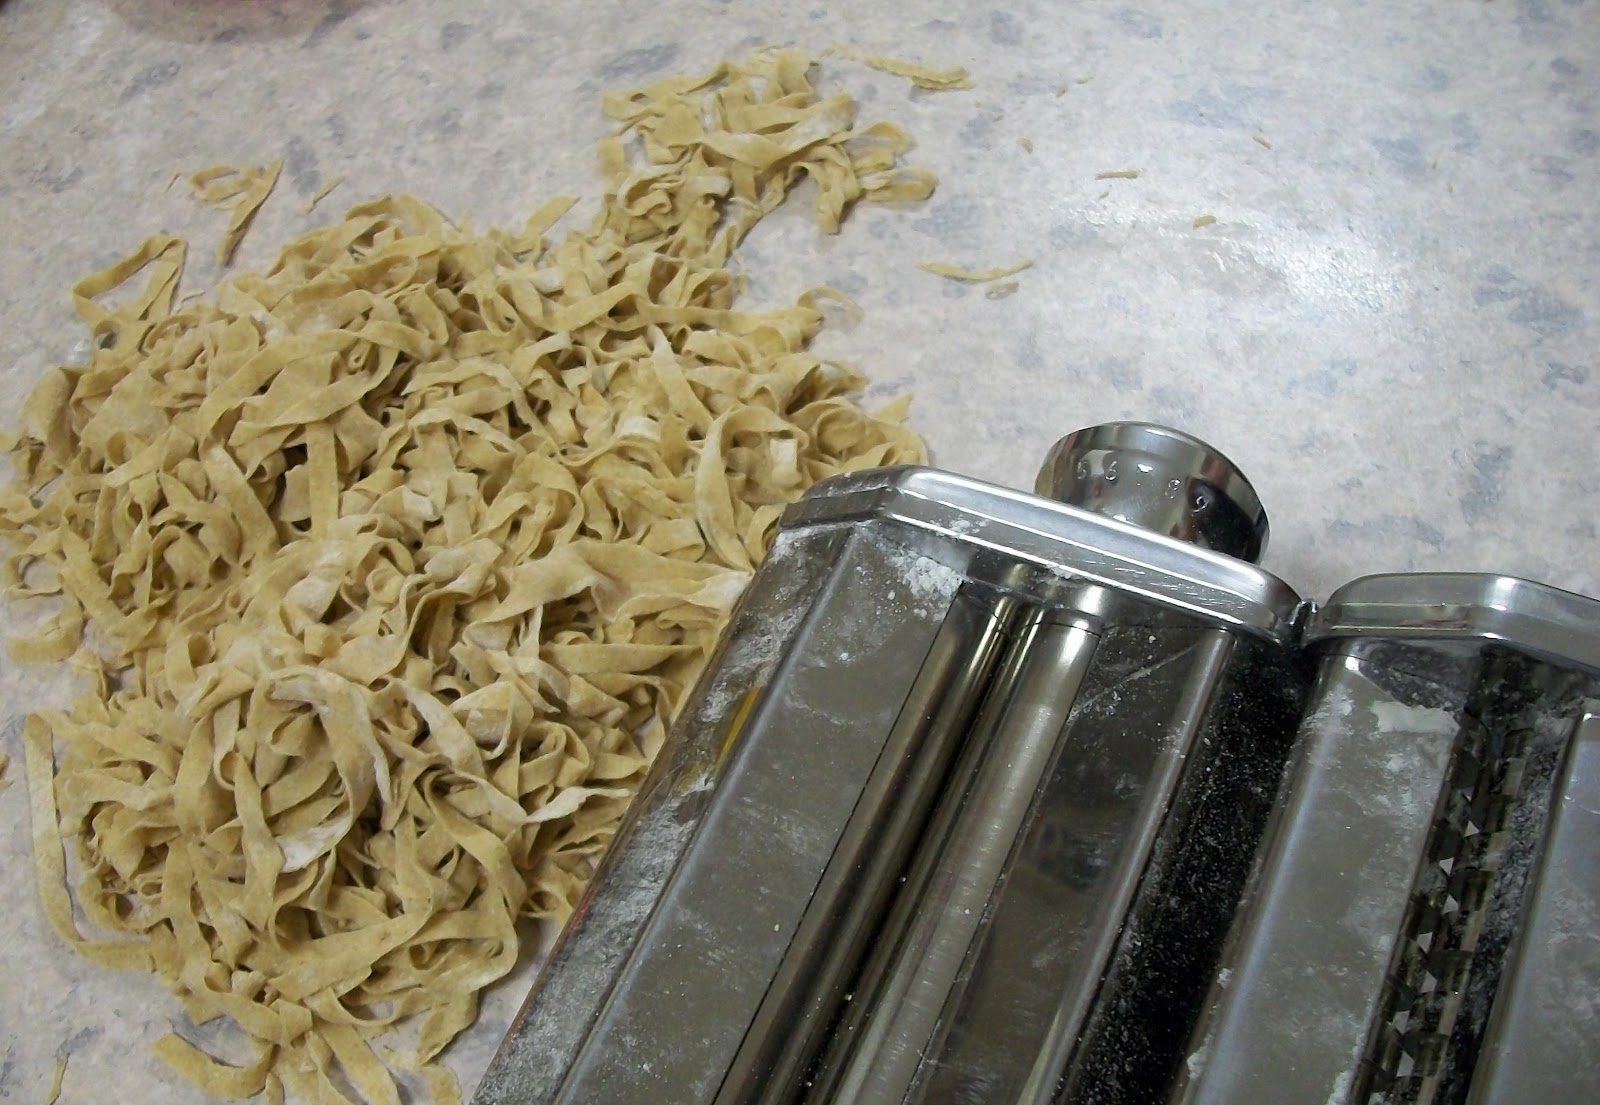
Once the water is boiling, add half of the pasta and let cook for 1 minute...remove the pasta with tongs and toss into the boiling soup....Repeat with the other half of the raw pasta. It's very quick!

then serve.........this soup was very filling, delicious...and quite rewarding; even for DS20 who took great joy in helping make the pasta.....Thanks mate...a job well done.

Do you have a grain mill? What other grains do you like to mill? I'd love to hear your ideas. 

Have you ever made your own pasta? Do you prefer wholemeal pasta or white pasta? How do you make your pasta? What do you add it to? 

Sunday, March 18, 2012

Wholemeal bread - a triple batch

I love making bread! Once you master it...your confidence grows even more to try other breads. When I make bread, I usually form it into rolls which is easily divided come meal time. Some favourites at home are our Kefir Milk Bread Rolls, Ground Soy Linseed and Almond bread and even the good old traditional white bread. I've even had a go at making Baguettes, but these recipes on my blog have all been using my bread machine in some way. I'm not sure I want to use my bread machine any more, as one thing that has always bothered me is the amount of dough for the time invested.......

I want to get the family used to eating my home-made bread on a day to day basis, but  it seems that old habits are hard to break when it comes to the lunch time sandwich......(And I have that extra challenge of making it every day myself, although I think it may be a timing challenge more than anything). When I was a Nanny back in my late teens, I made all the family's bread, but these days, I only make it roughly once a week, and on special occasions.....and it's always gone way too quick! 


For my birthday on Friday I was blessed to received a grain mill attachment for my Kenwood Mixer. So over the weekend I have been playing with the mill and also my lovely dough hook. Ahhhhh the joys of kneading are slipping my mind very quickly as I watch yet another big batch of dough working its magic in the Kenwood. "Maybe I can do this challenge" I think to myself. Maybe it won't be that hard if I don't have to knead the dough by hand............Maybe my family CAN enjoy the lovely aroma, flavour and goodness of fresh bread everyday; like the same that has come out of my kitchen for the last 3 consecutive days.

I've tried three recipes so far for Wholemeal bread...all bulk recipes to suit my Kenwood. I discovered in the instruction manual that the Kenwood can comfortably cope with 1.36kg of flour in making up a bread dough. This gives me more than one loaf of bread for the same amount of prep time. Brilliant!! I'm all for batch cooking as you know.

As I had trouble sourcing grain on Friday morning...I only bought 500g of wheat from the local health food store. This cost me $2.10....so there must be a cheaper way to buy wheat.....but seeing it was the first time I was using my new grain mill....I dismissed the price. (just this once). I have to be sensible about this too, seeing I still have plenty of bulk flour in my store cupboard to use up; but this also gives me time to find a cheaper supplier of fresh wheat, spelt, chia, quinoa, hemp or other grains.
Any suggestions for (bulk) grain suppliers for the Illawarra area would be greatly appreciated!! 
Or cost effective postable quantities ......


****************************
Wholemeal bread........a triple batch! This recipe comes from the recipe book that came with my Kenwood Chef Major....I just tripled the recipe to suit.

1125 grams Wholemeal Flour
225 grams plain White Flour
6 teaspoons salt
4 1/2 teaspoons dried yeast
900 mls lukewarm water

Wow, 5 ingredients.....DS20 looked around for a recycled bread bag from a store bought bread and had to count the ingredient list....19 ingredients....Hmmmm there's something to be said there!

Sorry, I've been blabbing on a bit with this post, but it's been a while since I chatted with you all...lol...so......

Back to the recipe.....
Place the flours, salt and yeast in the Kenwood bowl, and using the dough hook on the minimum speed....gradually add the lukewarm water. Mix on minimum speed until a soft dough is formed.

Knead for 1 minute on minimum speed, then 4 to 5 minutes on speed 1. You are looking for the dough to be smooth (as smooth as wholemeal grain can look anyway)...and elastic looking.  Once the dough is kneaded....cover with lightly oiled plastic film and leave to rise. Best risen in a warm place....If it's a cold day, the perfect climate to rise a bread dough is in the warmth of a closed car parked in the sun.

Once the dough doubles in size........

Knock it back and roll out onto a lightly floured bench. Knead it for a few minutes to knock the air out of the dough.

This is when you shape the dough to what breads you want.....You could make one huge free-form loaf like this......

But this mixture was enough for two medium loaves of bread and 8 dinner rolls. The other night I also made 1 extra large loaf of bread and 10 rolls.

So it's really just up to your imagination or family needs. I can tell you though...that if you have just enough bread rolls to accompany a meal....there's no fights over anyone sneaking an extra slice when your not looking. We have 5 people in our family, so I always make up rolls in lots of 5. The rolls are shared out evenly, but also allocated for meals and NOT hungry teenager snacks. ...It can be frustrating to see all that hard work to be gobbled up in 5 minutes, just because your not in the kitchen when your boys come home....I'm sure you've been there, even with biscuits or cake too.

(Hubby is away through the week now...so this lot is two batches of four...Sorry Hubby you miss out on this lot) .....I did give Hubby a huge loaf to take with him though...... and have since been told that the lady he is staying with insisted they sat down and had a slice immediately ....with my home-made blackberry jam. I'm glad you like my bread Lola!

Weighing the dough out evenly for rolls
makes them bake all at the same size.
Preheat the oven now to 230 degrees celcius.....and allow the shaped dough to rise again....
Ready for the 2nd rise
Now add the rolls to the oven, these will be risen and ready before the loaves.....Bake the rolls for roughly 15 to 20 minutes or until they sound hollow when tapped on the bottom.
Once the rolls are removed from the oven, place the larger tins in and bake for 10 minutes before turning the oven down to 200 degrees....and baking for a further 20 to 30 minutes.  Remove tins from the oven and take the bread out of the tin immediately....allow the bread to cool on a wire rack.

The wire rack is hidden beneath the tea-towel.
I also covered the loaves with the other half of the tea-towel
allowing them to cool before putting away.


I'm loving this wholemeal bread, I can't wait to source some wheat grain, so I can grind my own flour fresh for each loaf.


Do you have a grain mill? If so, what other ingredients do you mill?

Friday, August 5, 2011

My first Sour Dough....Yipppeeeee!

You may have noticed I have a bright blue button on my blog...it links to a blog by a lovely lady who I have been corresponding with since I joined the Down to Earth Forum.......
Her name is Wendy.....Wendy has been guiding me through this sourdough adventure.....and she even sent me some of her own sourdough baby.....What a lovely offering.

So under Wendy's instruction.....here goes....this is what I have done so far........
After my sourdough baby's big trip across the border...well it needed some time to recover.....so after two days sitting nice and quiet...I moved it into bigger pj's as I fed it 3/4 cup of flour and the same in tank water.

Then the following two days, I did the same but fed it 1 cup of water and 1 cup of flour....It's growing up, so it needs a bigger feed...lol.


After the first feed

Bubbles, bubbles......


so about a week after the birth of my baby sourdough.....
I made the sponge for my first loaf of sourdough......
using:
2 cups of sourdough starter
2 cups of flour
2 cups of rain water

Mixed well, then left it overnight....(best to do this in the morning)


The evening of the same day.......I made my dough....
add the 'sponge' to a larger bowl....
add the following...
2 tspns of sugar
2 tspns of salt
3 tablespoons of oil
2 cups of flour

Kneed the dough for 15 minutes, it will be rather sticky to start with....and I worked in an extra 1 1/2 cups of flour (Wendy said about 1...so It's all good from here)
Then into an oiled bowl....and leave overnight....
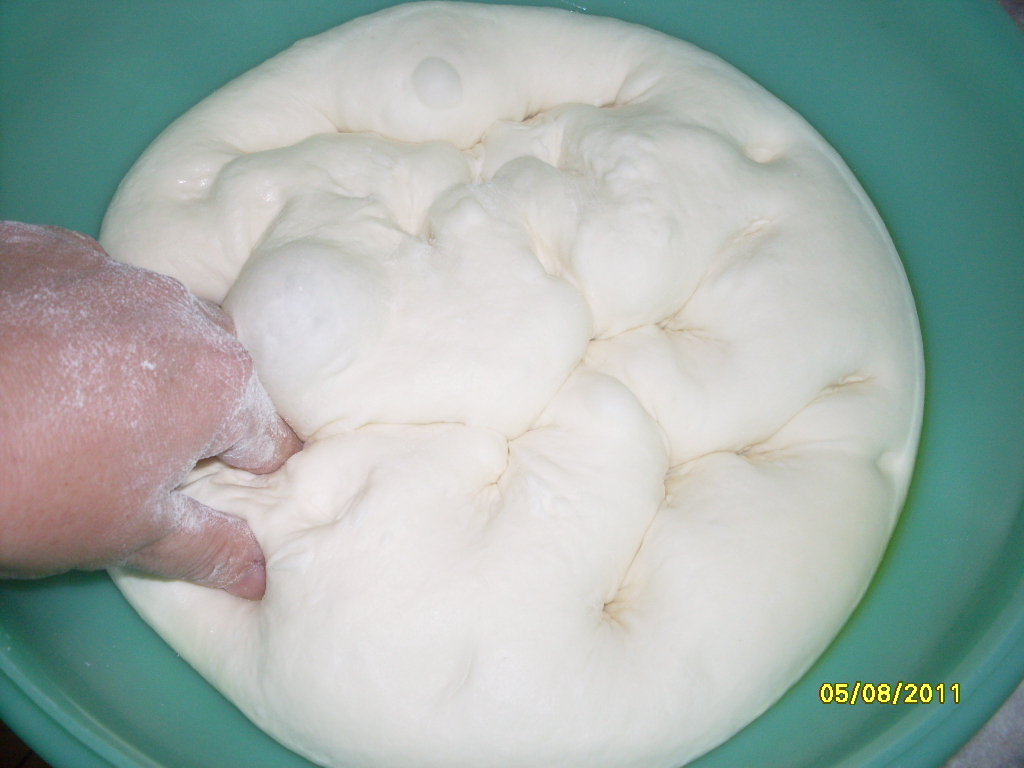
 The following morning....Look how much it has increased in size...Amazing!
 Now gently punch it down....see the large air pockets in the dough....You don't want to disturb these too much...there's a huge one touching my fingers.
 Shape the dough, and place on your chosen baking tray....I thought this pizza tray would be good, but the heat didn't get through as well as I expected...so I will think of a different base for the next loaf....
Now that I have a loaf on the go, nearly in the oven....I have made another 'sponge'...using another 2 cups of sourdough starter....and the process begins again.......It's so exciting........
Don't forget to start feeding your sourdough starter again.......I've given it 1 cup each of water and flour..and I will do the same tomorrow.......
Ok...I'm rather inpatient sometimes...and as it was a lovely day...I figured I could speed up the process of the second prove.....by sitting it in my car.....ohhhh it was sooo toasty and warm in there.......

Look how much my dough has risen......Yep even more exciting now.....I can't wait to taste it....

By now my oven is preheated to much hotter than I normally have......and I have cut slits into the loaf...
 placed it in the oven on very high for 15 minutes....then turned the oven down to 190c...for another 30 minutes......

LOOK! OMG......Yep I'm yelling to tell the world that I made my first sour dough....and I owe it all to Wendy.......THANKS WENDY!!!!!!

My family were amazed at the huge size of the loaf....and couldn't wait to try it.....OMG it's better than any sourdough loaf I have ever tasted....I hesitate to think how much this would cost in the stores.....


Making a sourdough loaf isn't really that hard, you just need to be patient.......it's so worth the wait.....
I can't wait to try out other recipes using the sourdough starter....Wendy, If you're reading this....I'd love that pancake recipe you mentioned......
Please check out Wendy's blog, she is an amazing writer....Wendy was thoughtful enough to send Mum and myself a lovely 'Calendula Hand & Body Lotion'.....Wendy sells this lotion and other wonderful soaps and products through her shop at 'Find My Hearth'....

After reading about my paving, she thought my hands could do with some extra care.....Thank-you so much Wendy...Mum was chuffed to know that you thought of her as well.....

I'm so pleased that I have started this sourdough adventure.....Thanks Wendy...Bless Ya!

Hope everyone has a lovely weekend....take care, I hope to see you back here early in the week.

Thursday, June 23, 2011

making Baguettes or Bread sticks

I've been wanting to make Bread Sticks for ages now...as I only ever buy them if I see them marked down......I was excited when I accidentally found a link on how to keep your baguettes in shape while rising....If you scroll down a bit on the link, you will even see that someone has used a painters drop sheet to shape the bread.

I WAS looking for bread proving bowls made out of willow or cane....You know the ones that leave a lovely spiral in the crust of the bread? Yeah, they are sooo expensive, so I guess I will search for the materials and try to make them myself. 

Ok, back to the Baguettes or Bread Sticks as I know them.....The cloth you are need is called a Bakers Couche or a Couche Cloth....and they aren't cheap either....but after doing some research...all you really need is some Heavy Canvas.......the width of the baking tray you will use all the time. But don't cut the length, until you know how many rolls you can support on the chosen tray....I can tell you the measurements of my cloths though...

I looked up canvas in the phone book...and it was easy as there was only one in the book in our area....On the way home from taking mum to do some much needed clothes shopping..(DS19 had a rostered day off, so he pushed mum in the wheelchair today...It's far to far for her to walk in the shopping centres)........

Oh yeah...On the way home I went via Illawarra Canvas in Dapto....and after trying to explain on the phone what I wanted to do with a piece of canvas....the lovely gentleman there gifted me a piece of canvas................

I'm very fortunate, as I had enough canvas to make cloths for two trays both lengthways AND widthways...You'll see what I mean in a minute..(when I stop blabbing on)....

Onto the making......the fun part.
After cutting out the required length of canvas....make sure you flour it well...get in there and run it in. If you don't you run the risk of your dough sticking....a very high risk too............
To get the estimated length of the canvas...
I used my rolling pin as a guide to how big each baguette may be.
Laying the rolling pin down as I gathered up the canvas,
repeating until I ran out of room on the tray.
 To make the baguettes....you don't need to settle for store choice of either Sourdough or Plain White......BECAUSE you are making them yourself...you can use any recipe you choose to.

I made some really yummy Linseed, Soy & Almond bread rolls a while back and adapted that recipe by adding some roughly crushed sunflower seeds and also Pumpkin (Pepita) seeds..which I gave a quick bash with the mortar & pestle........

I wish I had found this website before rolling the Baguettes....I found the dough a bit hard to manage while trying to make a long roll.....but technique has never been my strong suit...so I just had a go....and the rustic look is what I was going for anyway...Honest!!

Measure each piece of dough to the same weight
This ensures you get even sized rolls at the end.


Below I am forming longer baguettes by using the length of the tray.
If you scroll down further, you will see where I also used the width of the tray for forming shorter baguettes or rolls in this case.
I was just able to fit 4 baguettes on the baking tray....to rise.
 AFter rising....look how puffy they are....by this time...I couldn't wait to see how they would turn out...
All in all, not a bad experiment so far.

see the magic..how plump they are....
and rustic! Oh...Artisan....that's the one.

Using a piece of grease proof paper...
slide the paper just beneath the dough

Gently roll the formed baguette onto the paper...
then move over to your baking tray.

Position the Paper sheet on the tray
and unroll the baguettes; back onto the tray. 
So you really roll the dough only half way...onto the paper....then back again....off the paper and onto the baking tray....be careful you leave enough room for heat to get around the baguettes......I did rise them all on the one tray...but for baking...spread them out over a few trays if the tray you use is full.
This way they bake nice and even all round.
Soy, Linseed, Almond, Sunflower seed & Pumpkin seed.
And rustic too....Ooops! Artisan...lol

4 seeded bread-sticks
and 6 rolls (short, fat bread-sticks)


Oh...the tray you rise them on needs to be a similar size to the one you bake on......No point rising a breadstick; only to find out it's too long to fit in your oven...That would make me mad. I just used the same trays.

Using a smaller loaf recipe of just plain white..I also made some rolls using the same technique...Only this time I used the width of the tray....

weighing each roll to ensure the same sized rolls.

see how I supported the canvas...my two trays were now in the oven baking 4 baguettes...
I sure hoped they came out before these finished rising.


keeping the warmth of the oven in...
I must build a fold-down shelf  above the stove...
to prove my breads on..(good idea nellymary)
 Taa Daaaaaaaaaaaaaaaaaahhhhhhhhhh!!


Apart from about half of my housework list, and helping mum try on clothes for most of the day....this is what I accomplished....after I got back home.


Oh....sorry for the long post...but if  you have been following along...You'll probably know by now that I ramble a whole lot.


What did you get up to today?   Will you try making baguettes with your favourite bread recipe?
I'd love to hear about it. What do you think for a first go?
Related Posts Plugin for WordPress, Blogger...